
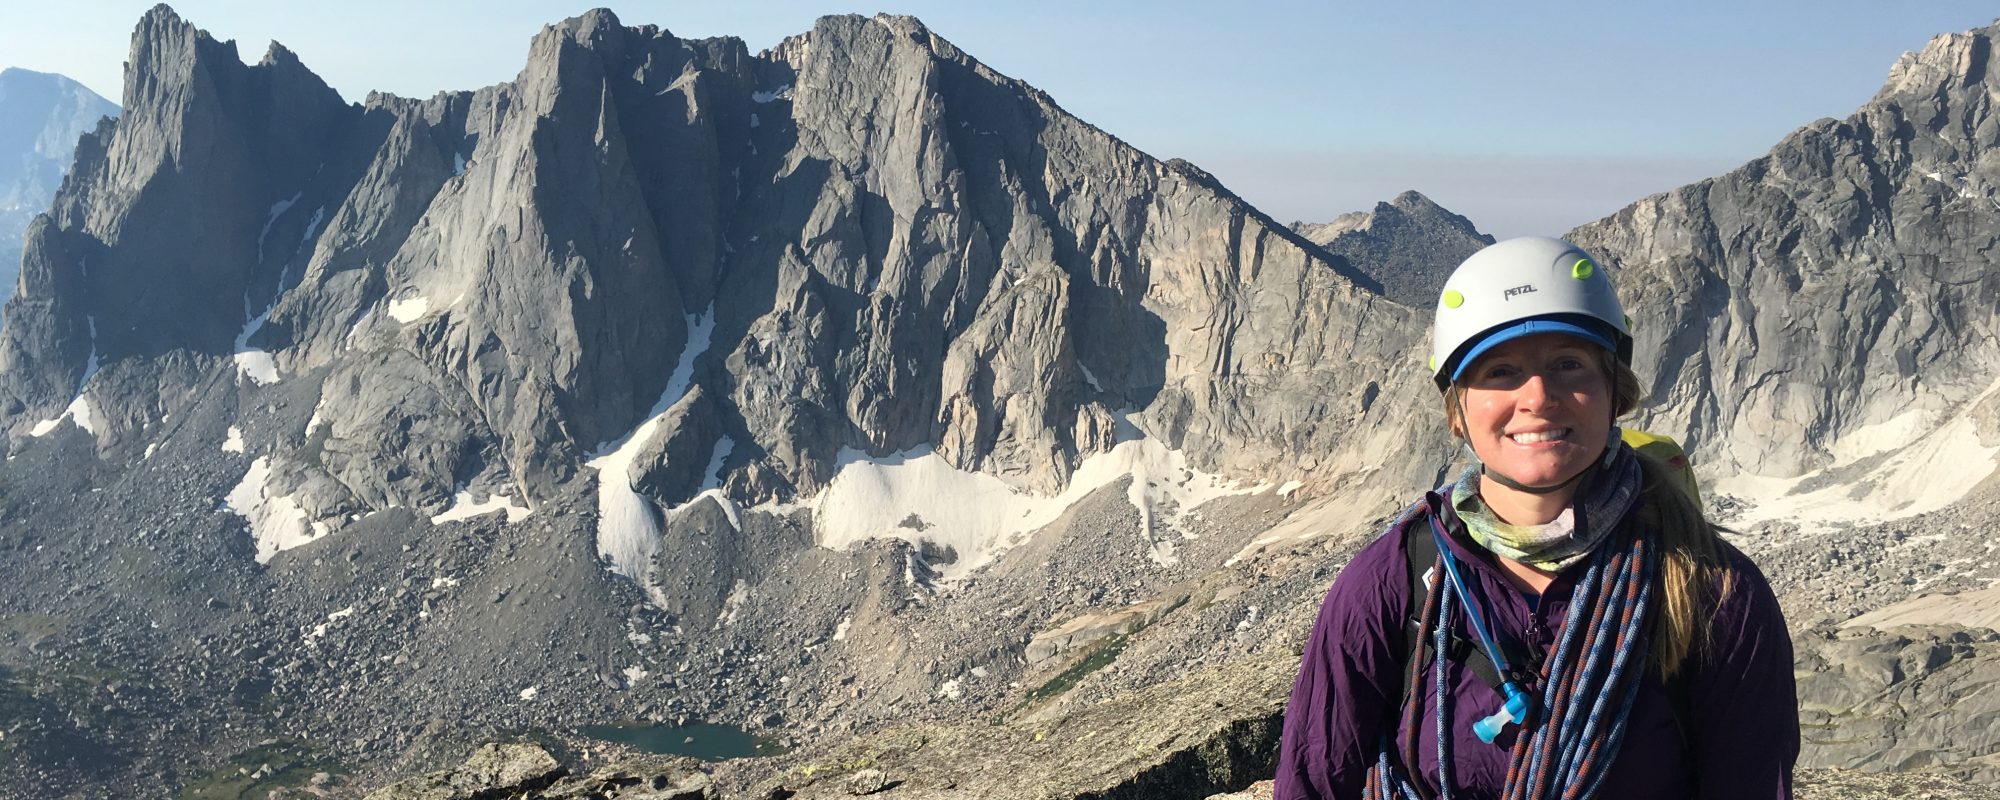
Date of Trip: July 28th – 31st, 2016
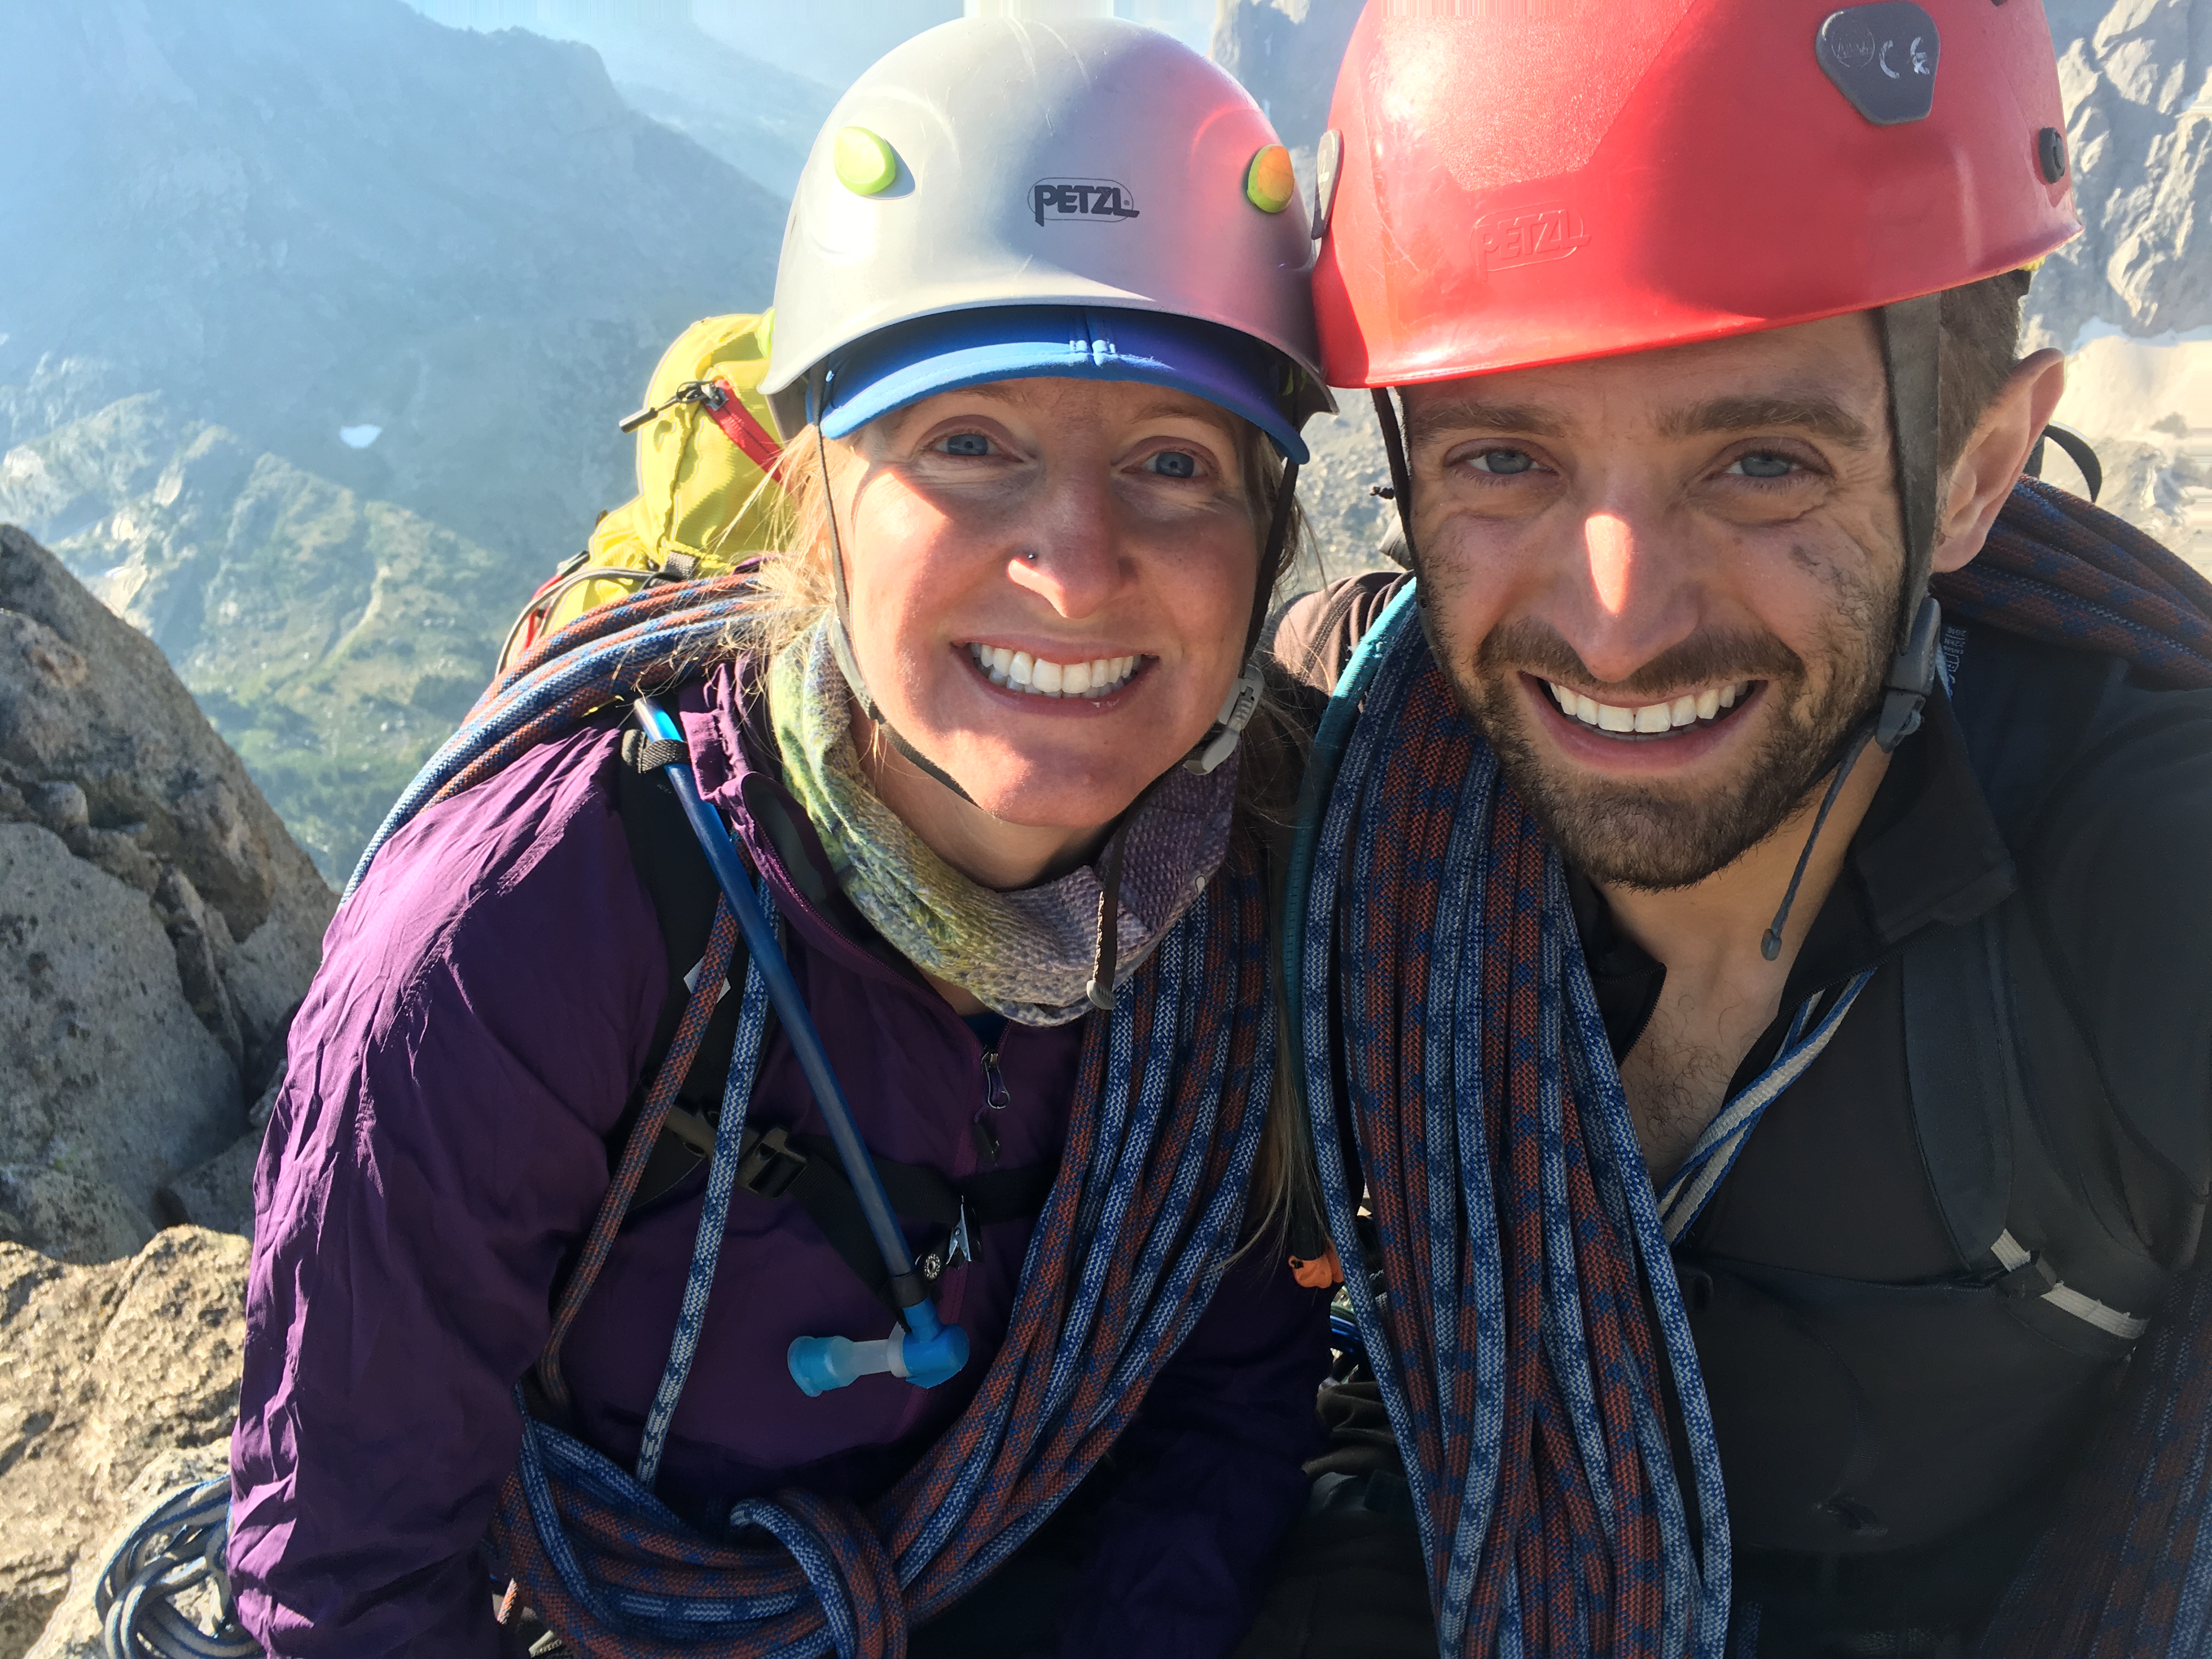
WOW!! This word still comes to mind whenever I think about our trip to the Cirque of the Towers. This is one of the most spectacular places that I have visited to date. All alpine climbers should add this location to their list. I’m going back some day for sure.
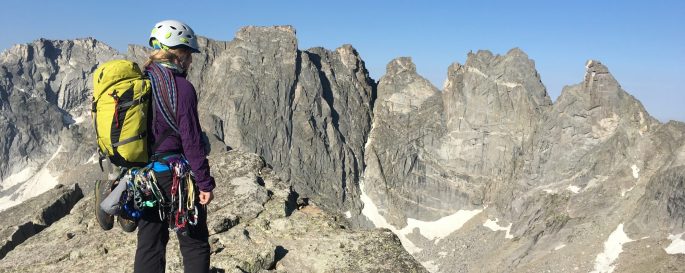
In summary: The approach is quite long and can feel difficult with the heavy pack you’ll be carrying – we didn’t do any climbing on the day we hiked in but some fast parties may be able to run up the South Buttress of Pingora after hiking in. On day 2 we climbed the South Buttress K-Cracks variation (Grade III, 5.8, 4 pitches) of Pingora and explored the approach to Wolf’s Head. On day 3 we climbed the East Ridge of Wolf’s Head (Grade III, 5.6, 10+ pitches) and on day 4 we hiked out.
Gear: We brought a full set of X4 and 4 link cams, 2 C3 and 3 and 4 C4. We hiked in with boots and brought our approach shoes for our climbing days. Some people do the hike in with their approach shoes, so that part is up to you but we liked having the extra support with the heavy pack. We also brought separate packs to wear while climbing – much nicer than trying to climb with a mainly empty overnight pack, but depending on the pack you have it may not be too bad. We brought 2 x 70m half ropes – on the first day we tried tying the ropes together and doing longer rappels but the rope kept getting stuck so I’d recommend just bringing one 70m single rope. A 60m rope should work for a lot of climbs too, but I would double check all the climbs you want to do just in case – I wouldn’t bring only a 50m rope.
A few helpful tips:
- There are a couple of guidebooks for the area but the best one for the classics is Cirque of the Towers and Deep Lake: A Select Guide to the Wind Rivers’ Best Rock Climbing. We purchased it at Wild Iris Climbing in Lander, WY.
- It was prior to this trip that we discovered the Mountain Project App. You can download it to your phone prior to the trip, then download all the areas and climbs you’re interested in, as well as corresponding pictures. Once it’s added, you can continue to read the route information when your phone is out of cell range/in airplane mode. Mountain Project is an extremely valuable resource where people can comment on the routes that they did, so it’s great when you don’t know anyone who has done the route you want to do before, but are looking information beyond the guidebook. Although I mention in point 1 above which guidebook I think is the best, it still has it’s limitations. The route description for Wolf’s Head for instance is very vague, thus you need to research a lot independently of the guidebook to complete this route. I suggest reading all the comments listed on Mountain Project about the west ridge of Wolf’s Head.
- Be prepared to make gear anchors – there are no bolted anchors on the climbs that we did.
- There are points where the approach trail splits so it’s helpful to have a map with you. We used the OsmAnd map app as it had the trails listed on it.
- These peaks are pretty high, so depending on where you live and the height of the mountains you normally climb you may notice the altitude here.
- There’s running water at camp, so no need to bring a water filter – we just brought Pristine Water Treatment Tablets.
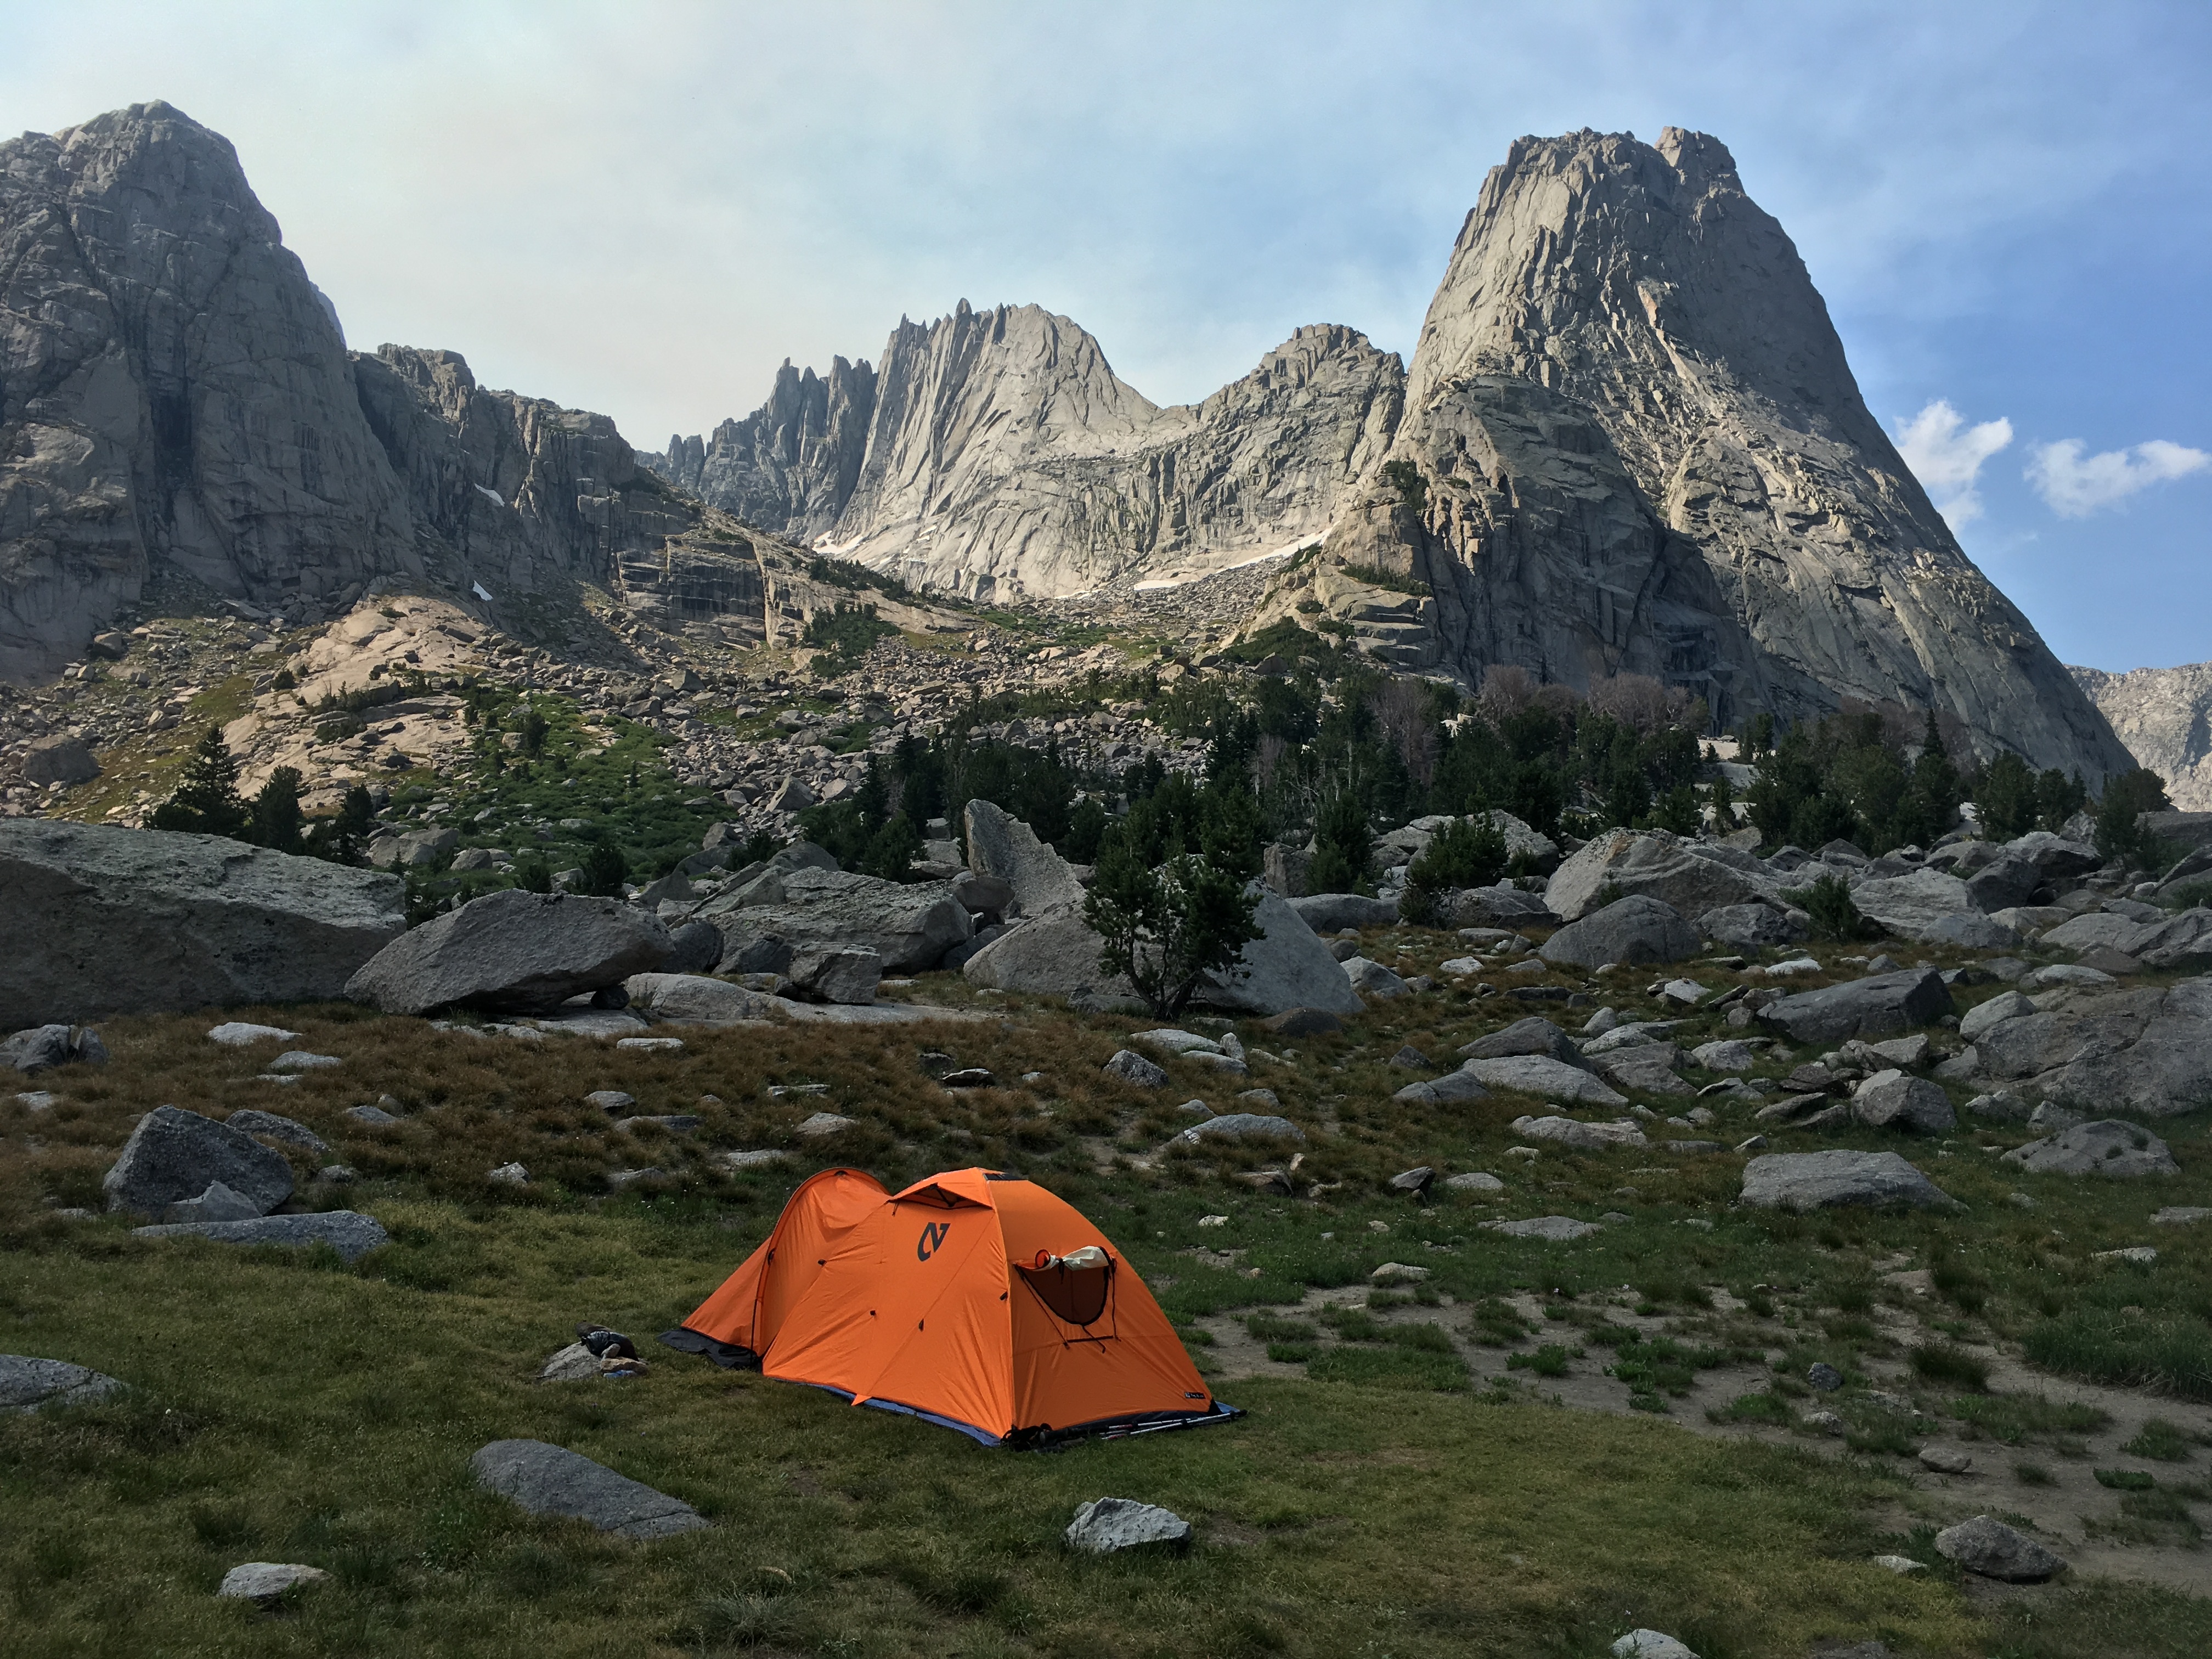
- We camped to the right of the river and found an open, flat area with some tall trees next to it to properly hang our food out of reach of any rodents or bears since we don’t have a bear canister. There were lots of campsites without good trees to hang your food, so you might want to consider bringing a bear canister. You can rent them from the ranger station in Lander, but it means you have to return them there so depending on your next destination this could be out of the way. We met some other people who camped higher up at Cirque Lake, so you could consider this as well.
- This is a primitive camp so you gotta pack out your poop. They don’t give bags to do this at the ranger station so you have to bring your own system.
- There were a lot of mosquitos around camp at dusk and dawn so be prepared with bug lotion or whatever you need to stay sane. 🙂
- Like many other areas in Wyoming, this area is known for its thunder and lightning storms in the afternoon, so do your best to get off the mountain early. Given this reason, and the fact that it’s an alpine climb, we had extra insulating layers, waterproof layers, and emergency bivy just in case we needed to hunker down mid climb.
- Apparently this place can get pretty busy in the weekends – there were a number of people there when we were, which extended over a weekend, but we didn’t have any issues with overcrowding on any of the routes.
Ok, enough of that! Time for the fun stuff… 🙂
♦ ♦ ♦ ♦
Day 1: Approach (9 miles, 6-8 hours) → The start of this trail is quite flat and non-technical for the first 10 miles to Big Sandy Lake. At the end of Big Sandy lake the trail continues up and left – if you come across any forks in the trail keep trending left. Eventually you’ll reach the base of Arrowhead Lake. On the other side of the lake you’ll see a trail – this is NOT the trail you want.
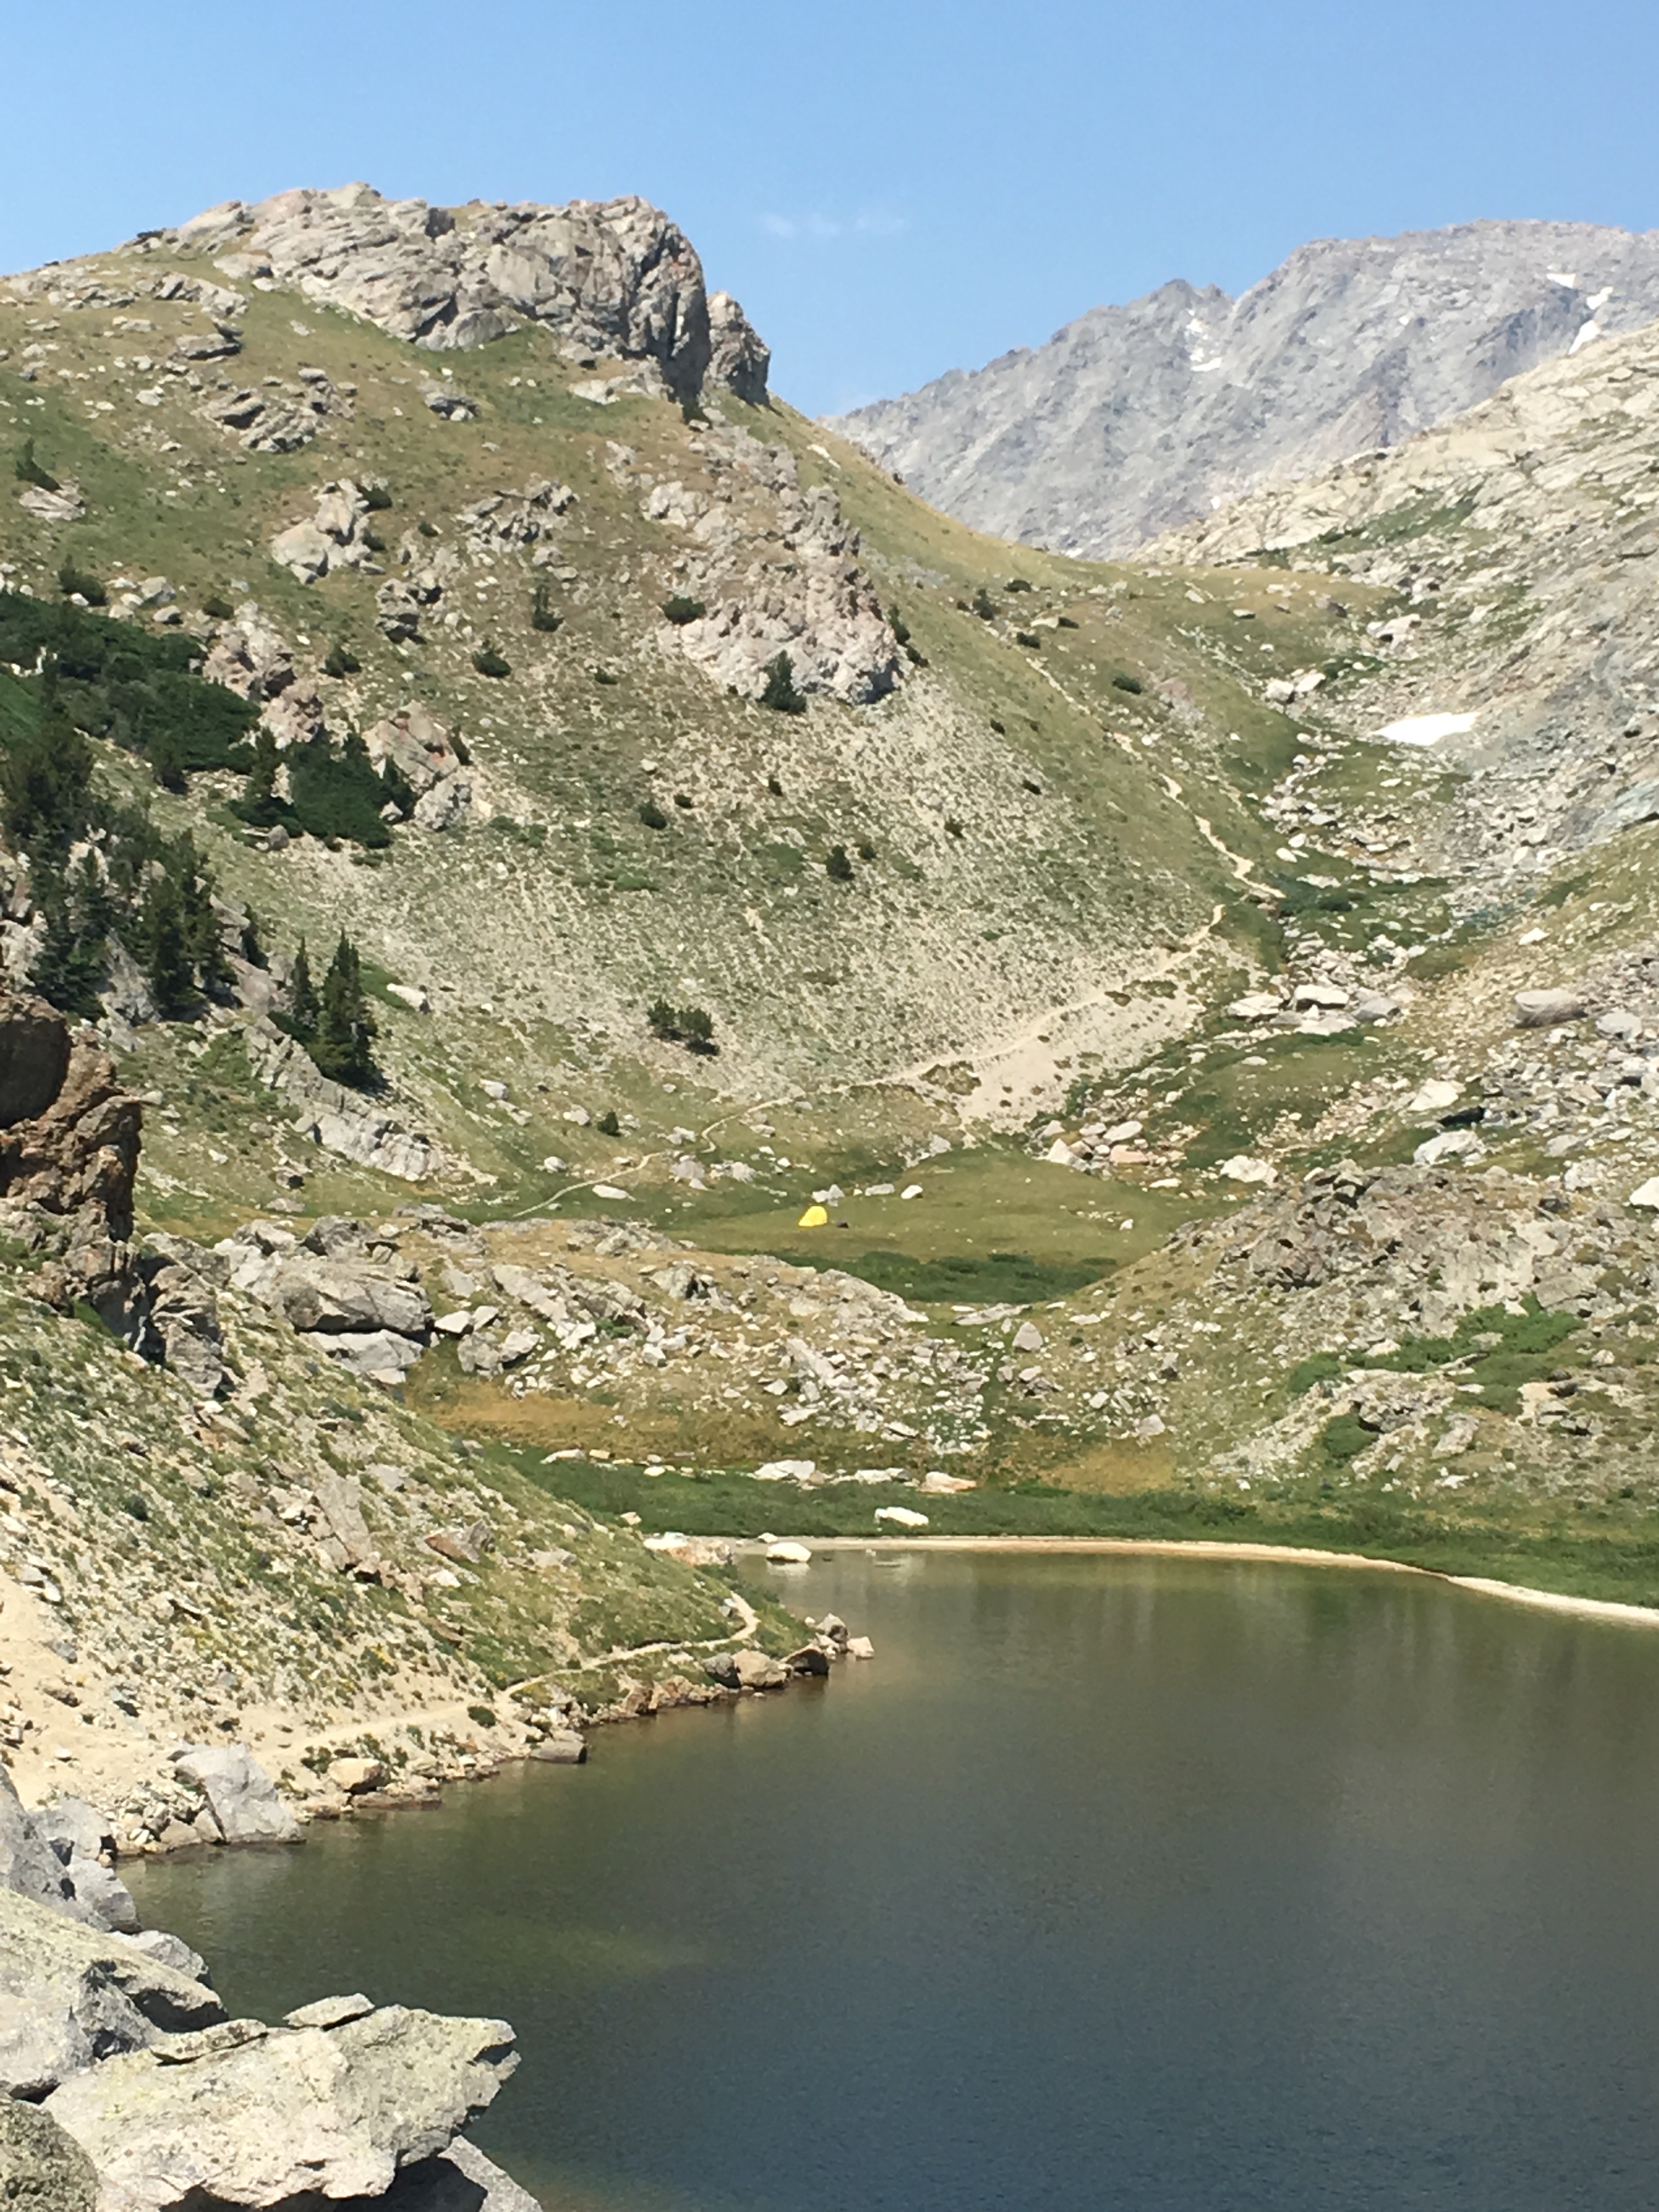
Instead, hike through the rocks/boulders up and left – we hugged the base of War Bonnet above us on the left, which was a good trail. On the way out we took the trail just right of the rocks you see in front of you (starts approximately in the bottom left corner of the above picture) but it requires crossing/navigating through many big boulders at the base of Arrowhead Lake. I slow down drastically when there are boulders this size to navigate with a heavy overnight pack and I don’t remember any big boulders when we took the route that hugged War Bonnet on the way up, so I would recommend that trail. In any case, both of these trails meet at the top. Once at the top you’ll see the cirque so just keep heading towards it.

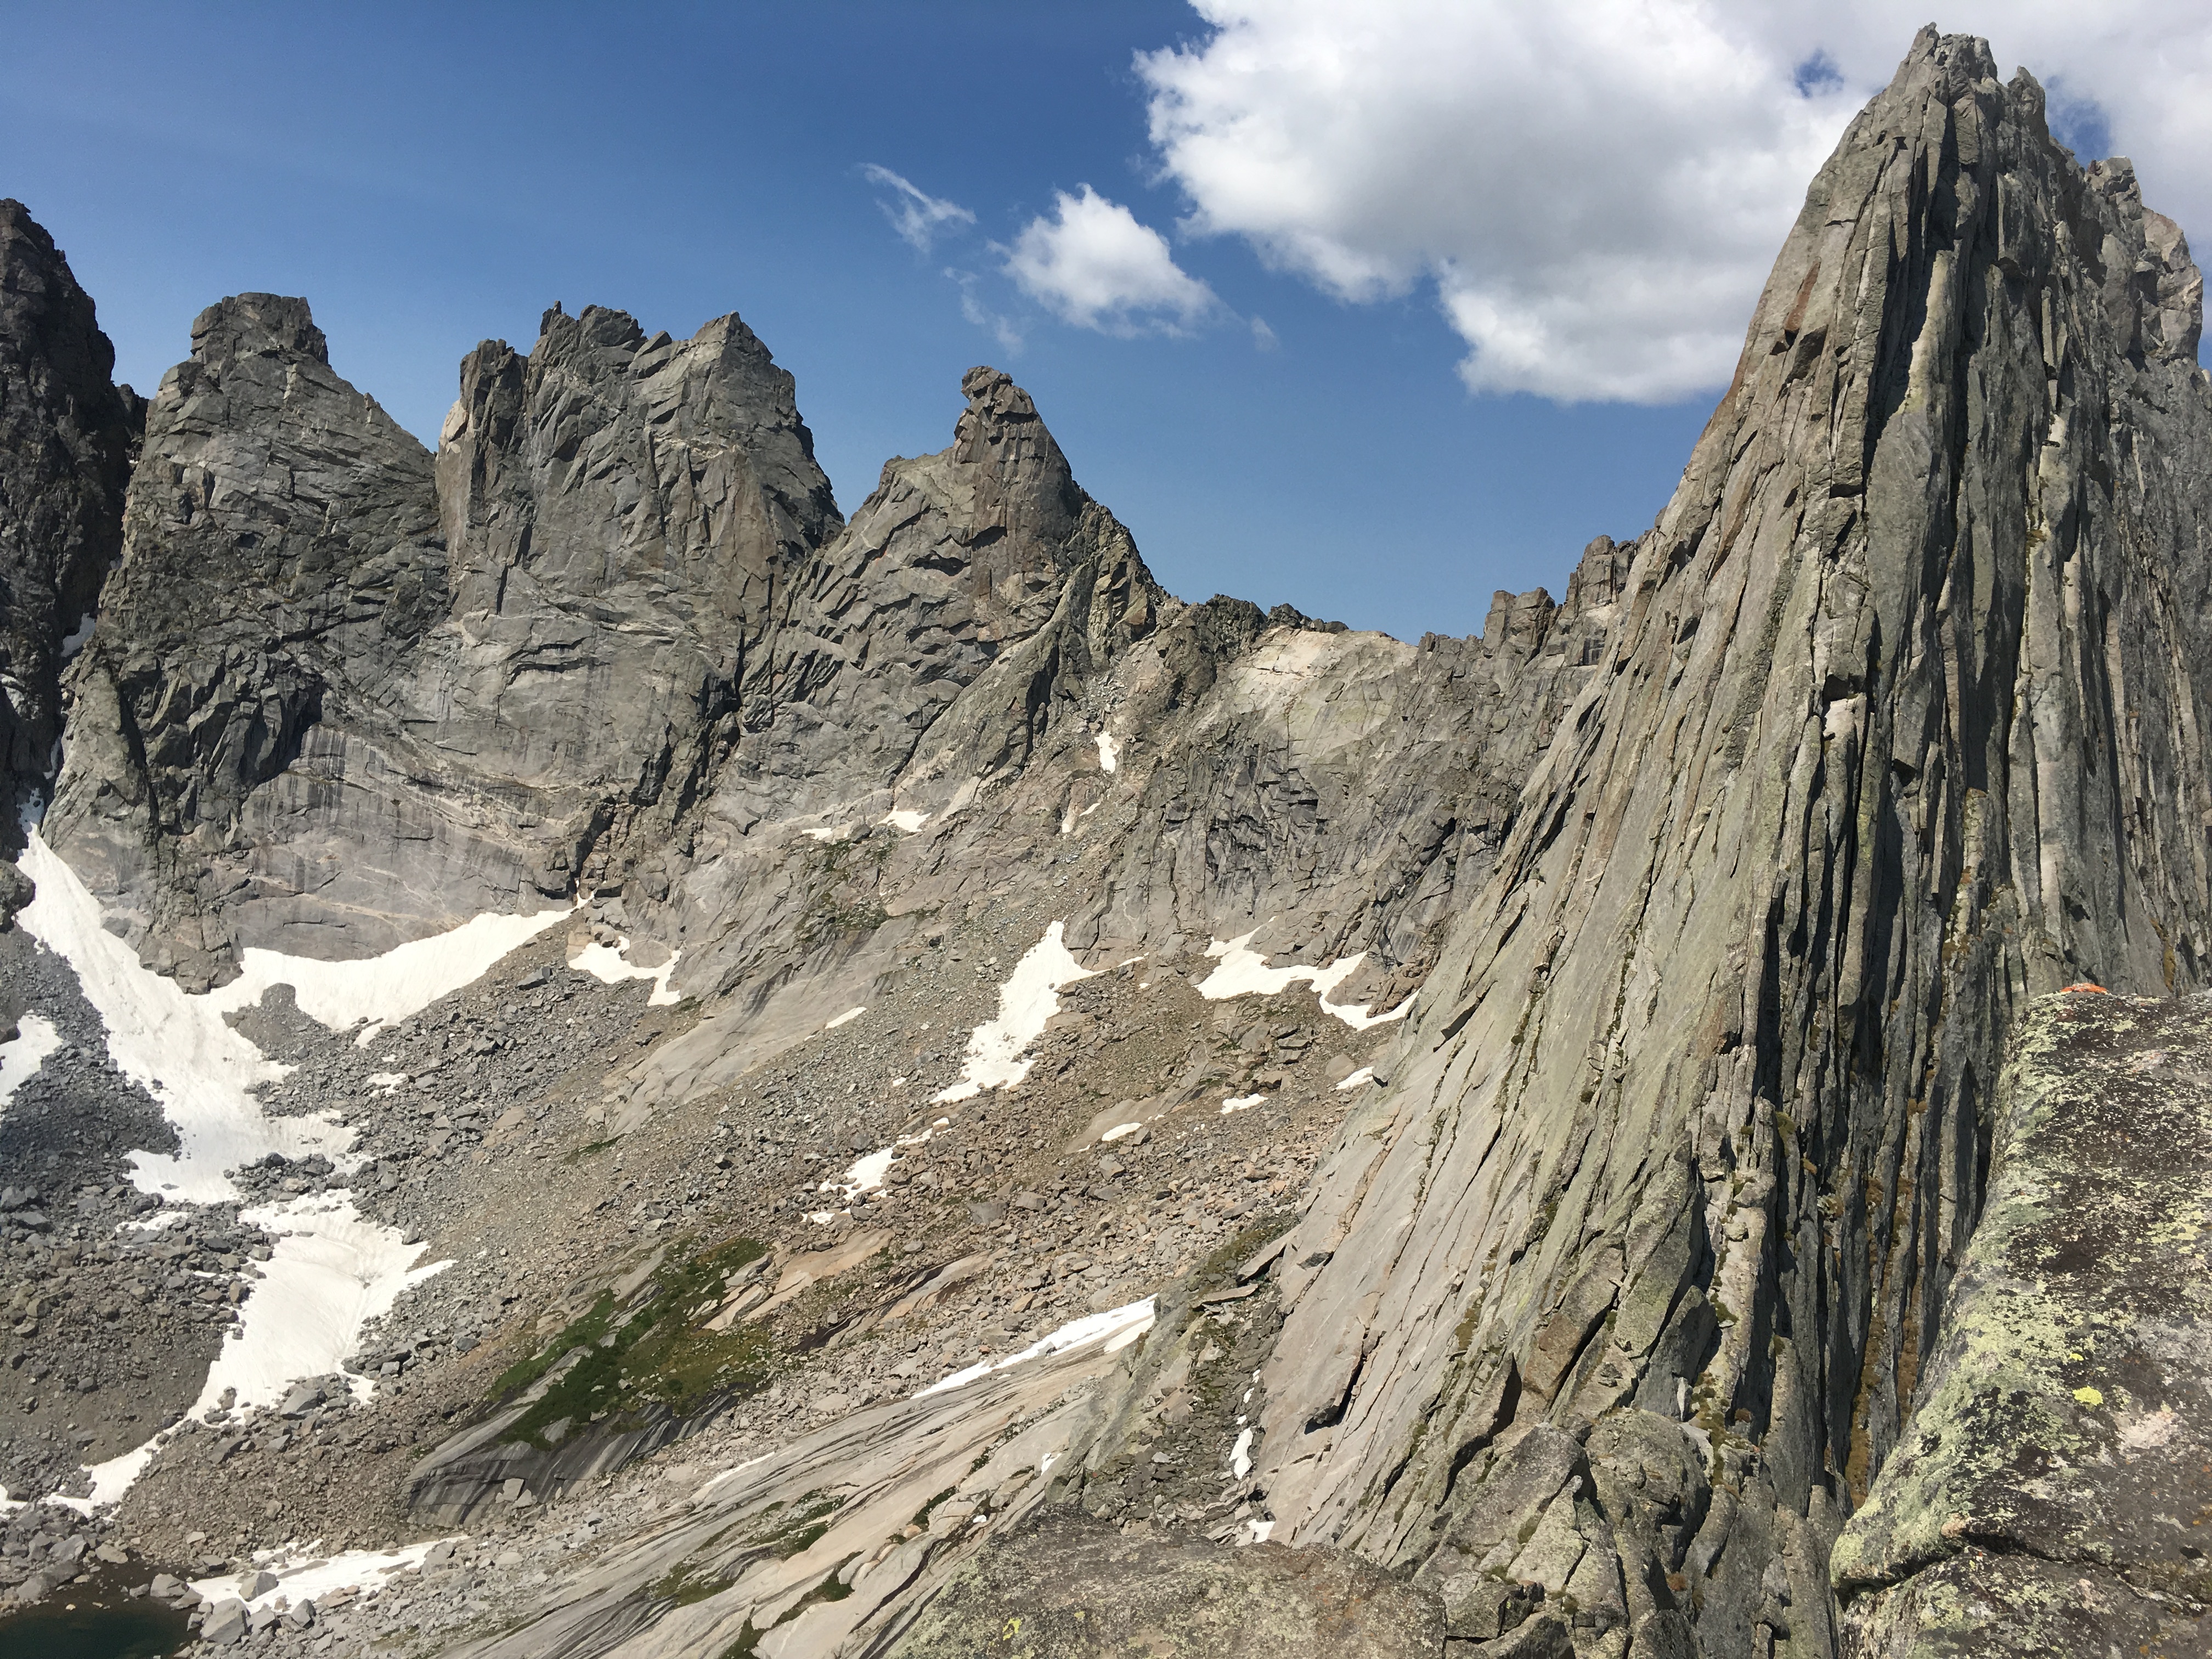
This trail continues through the camping and toward Cirque Lake, and thus it is also the approach to all the climbs.
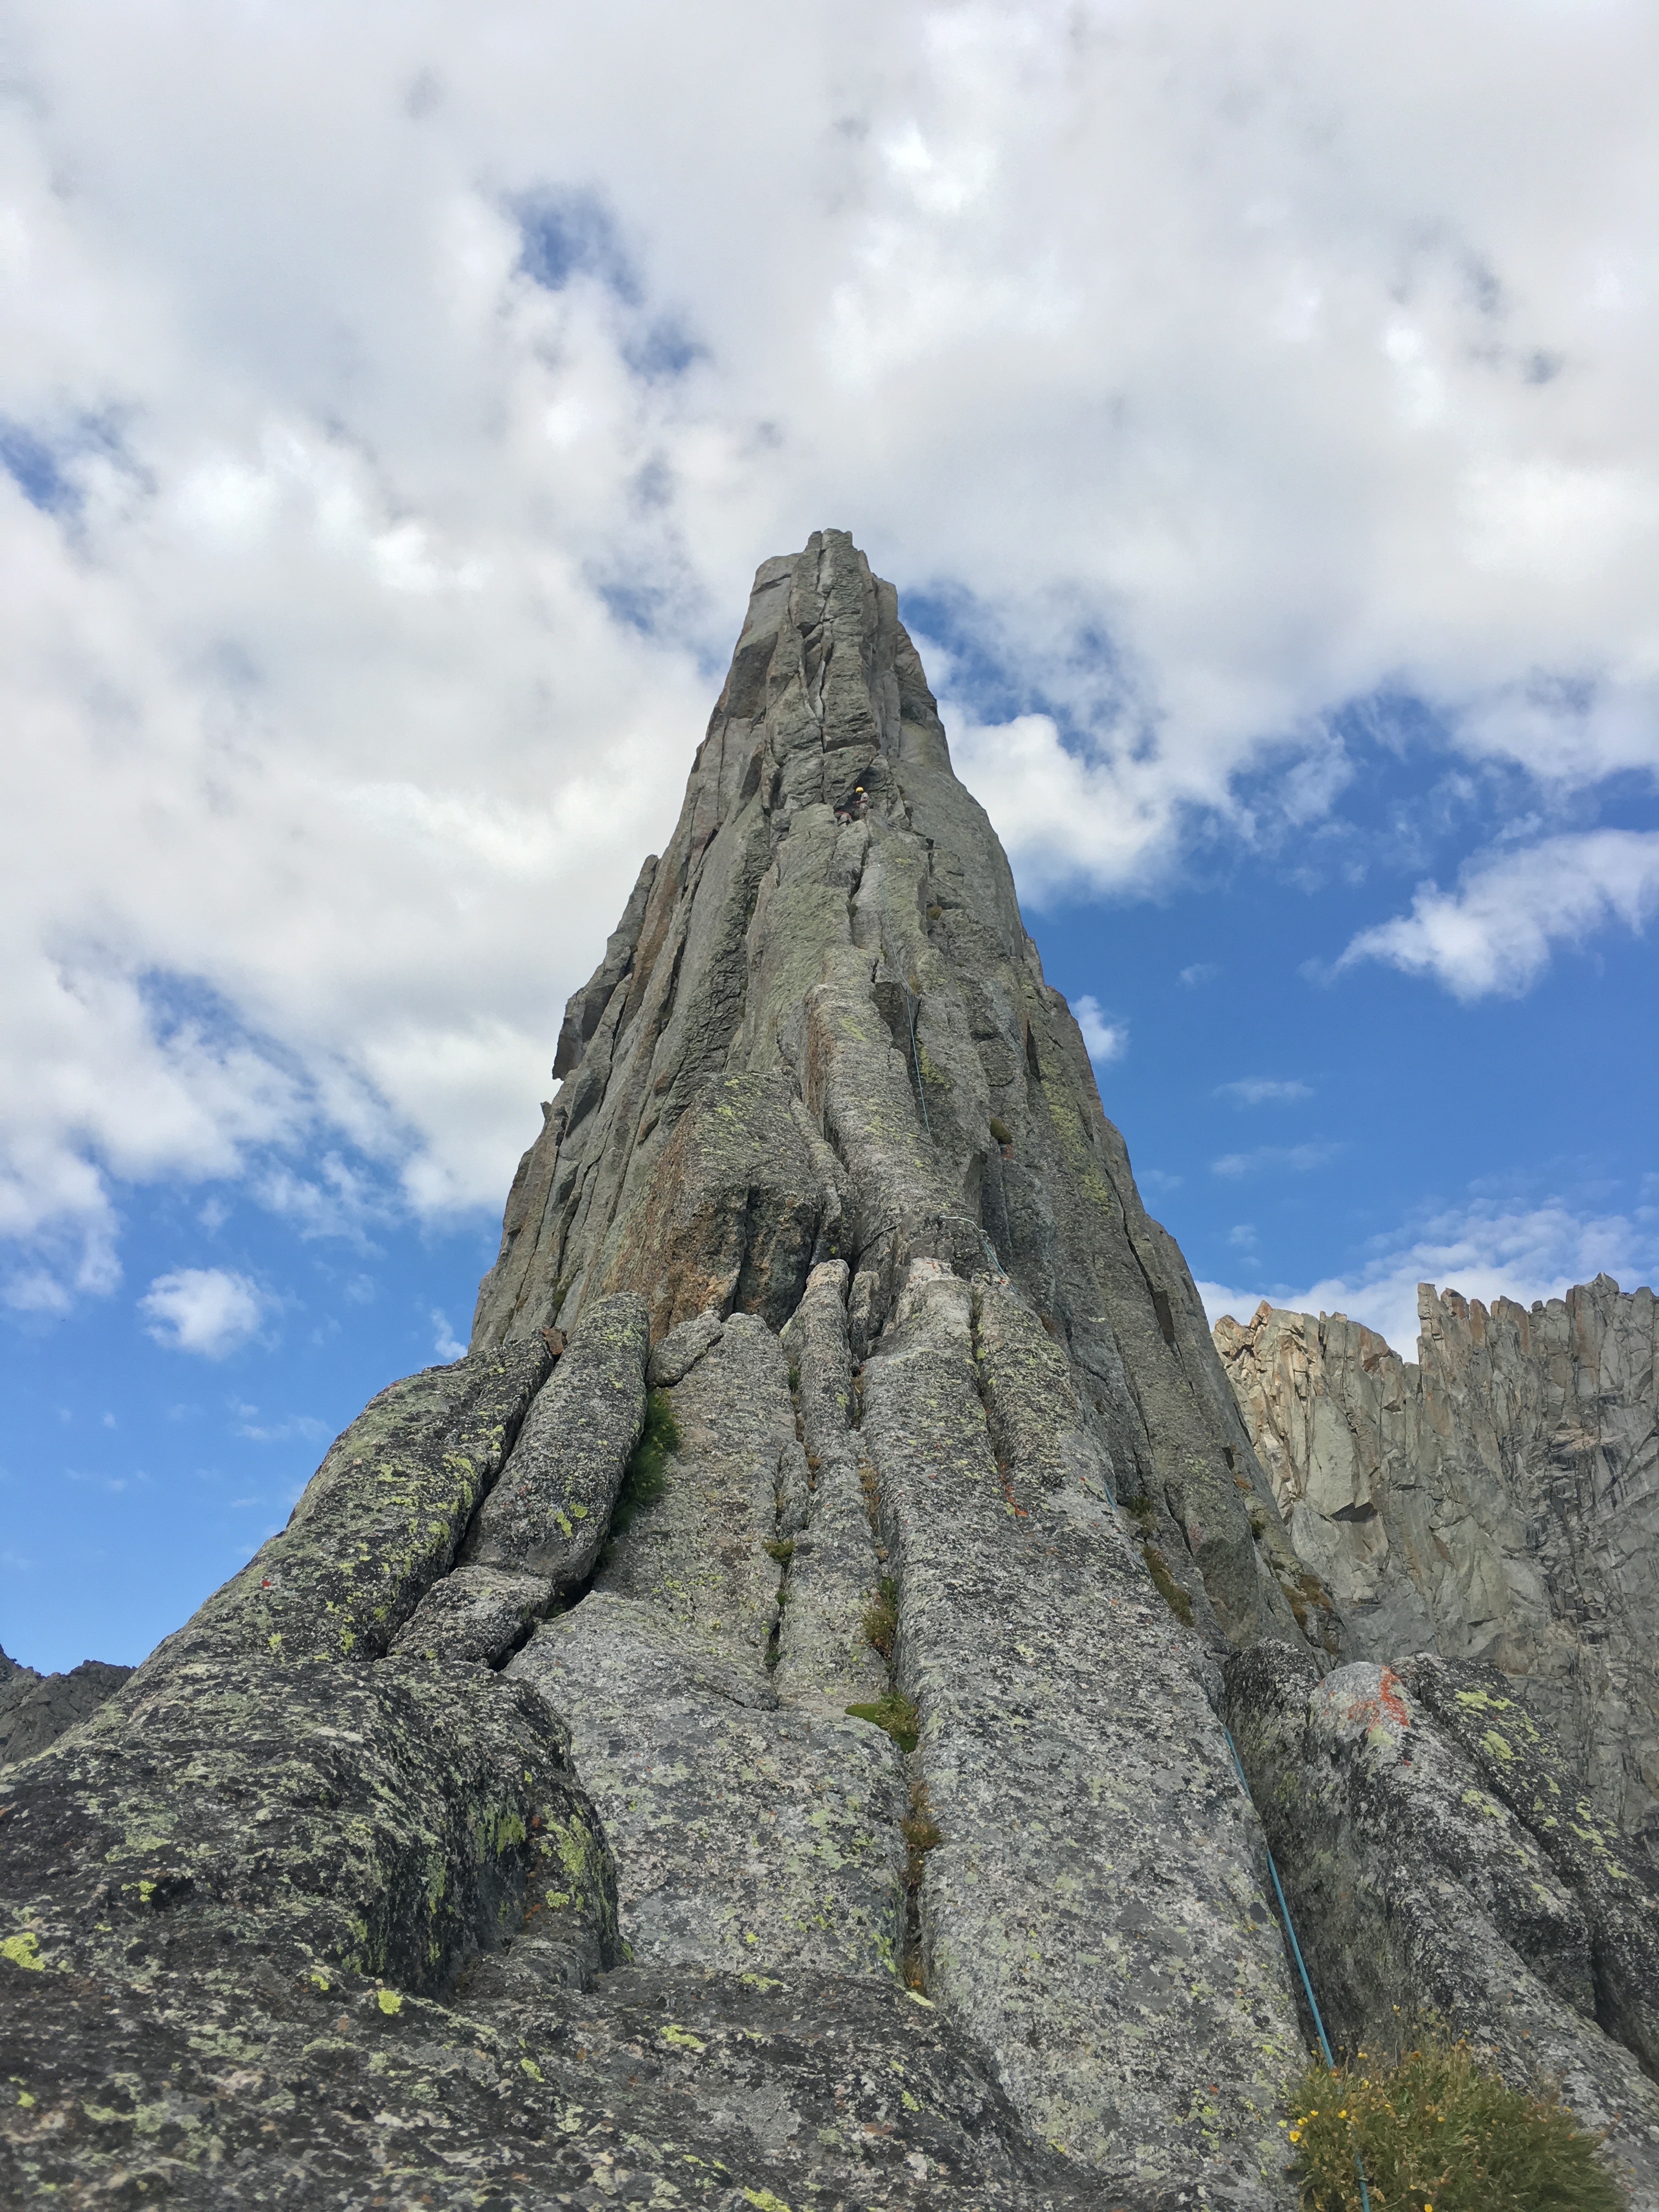
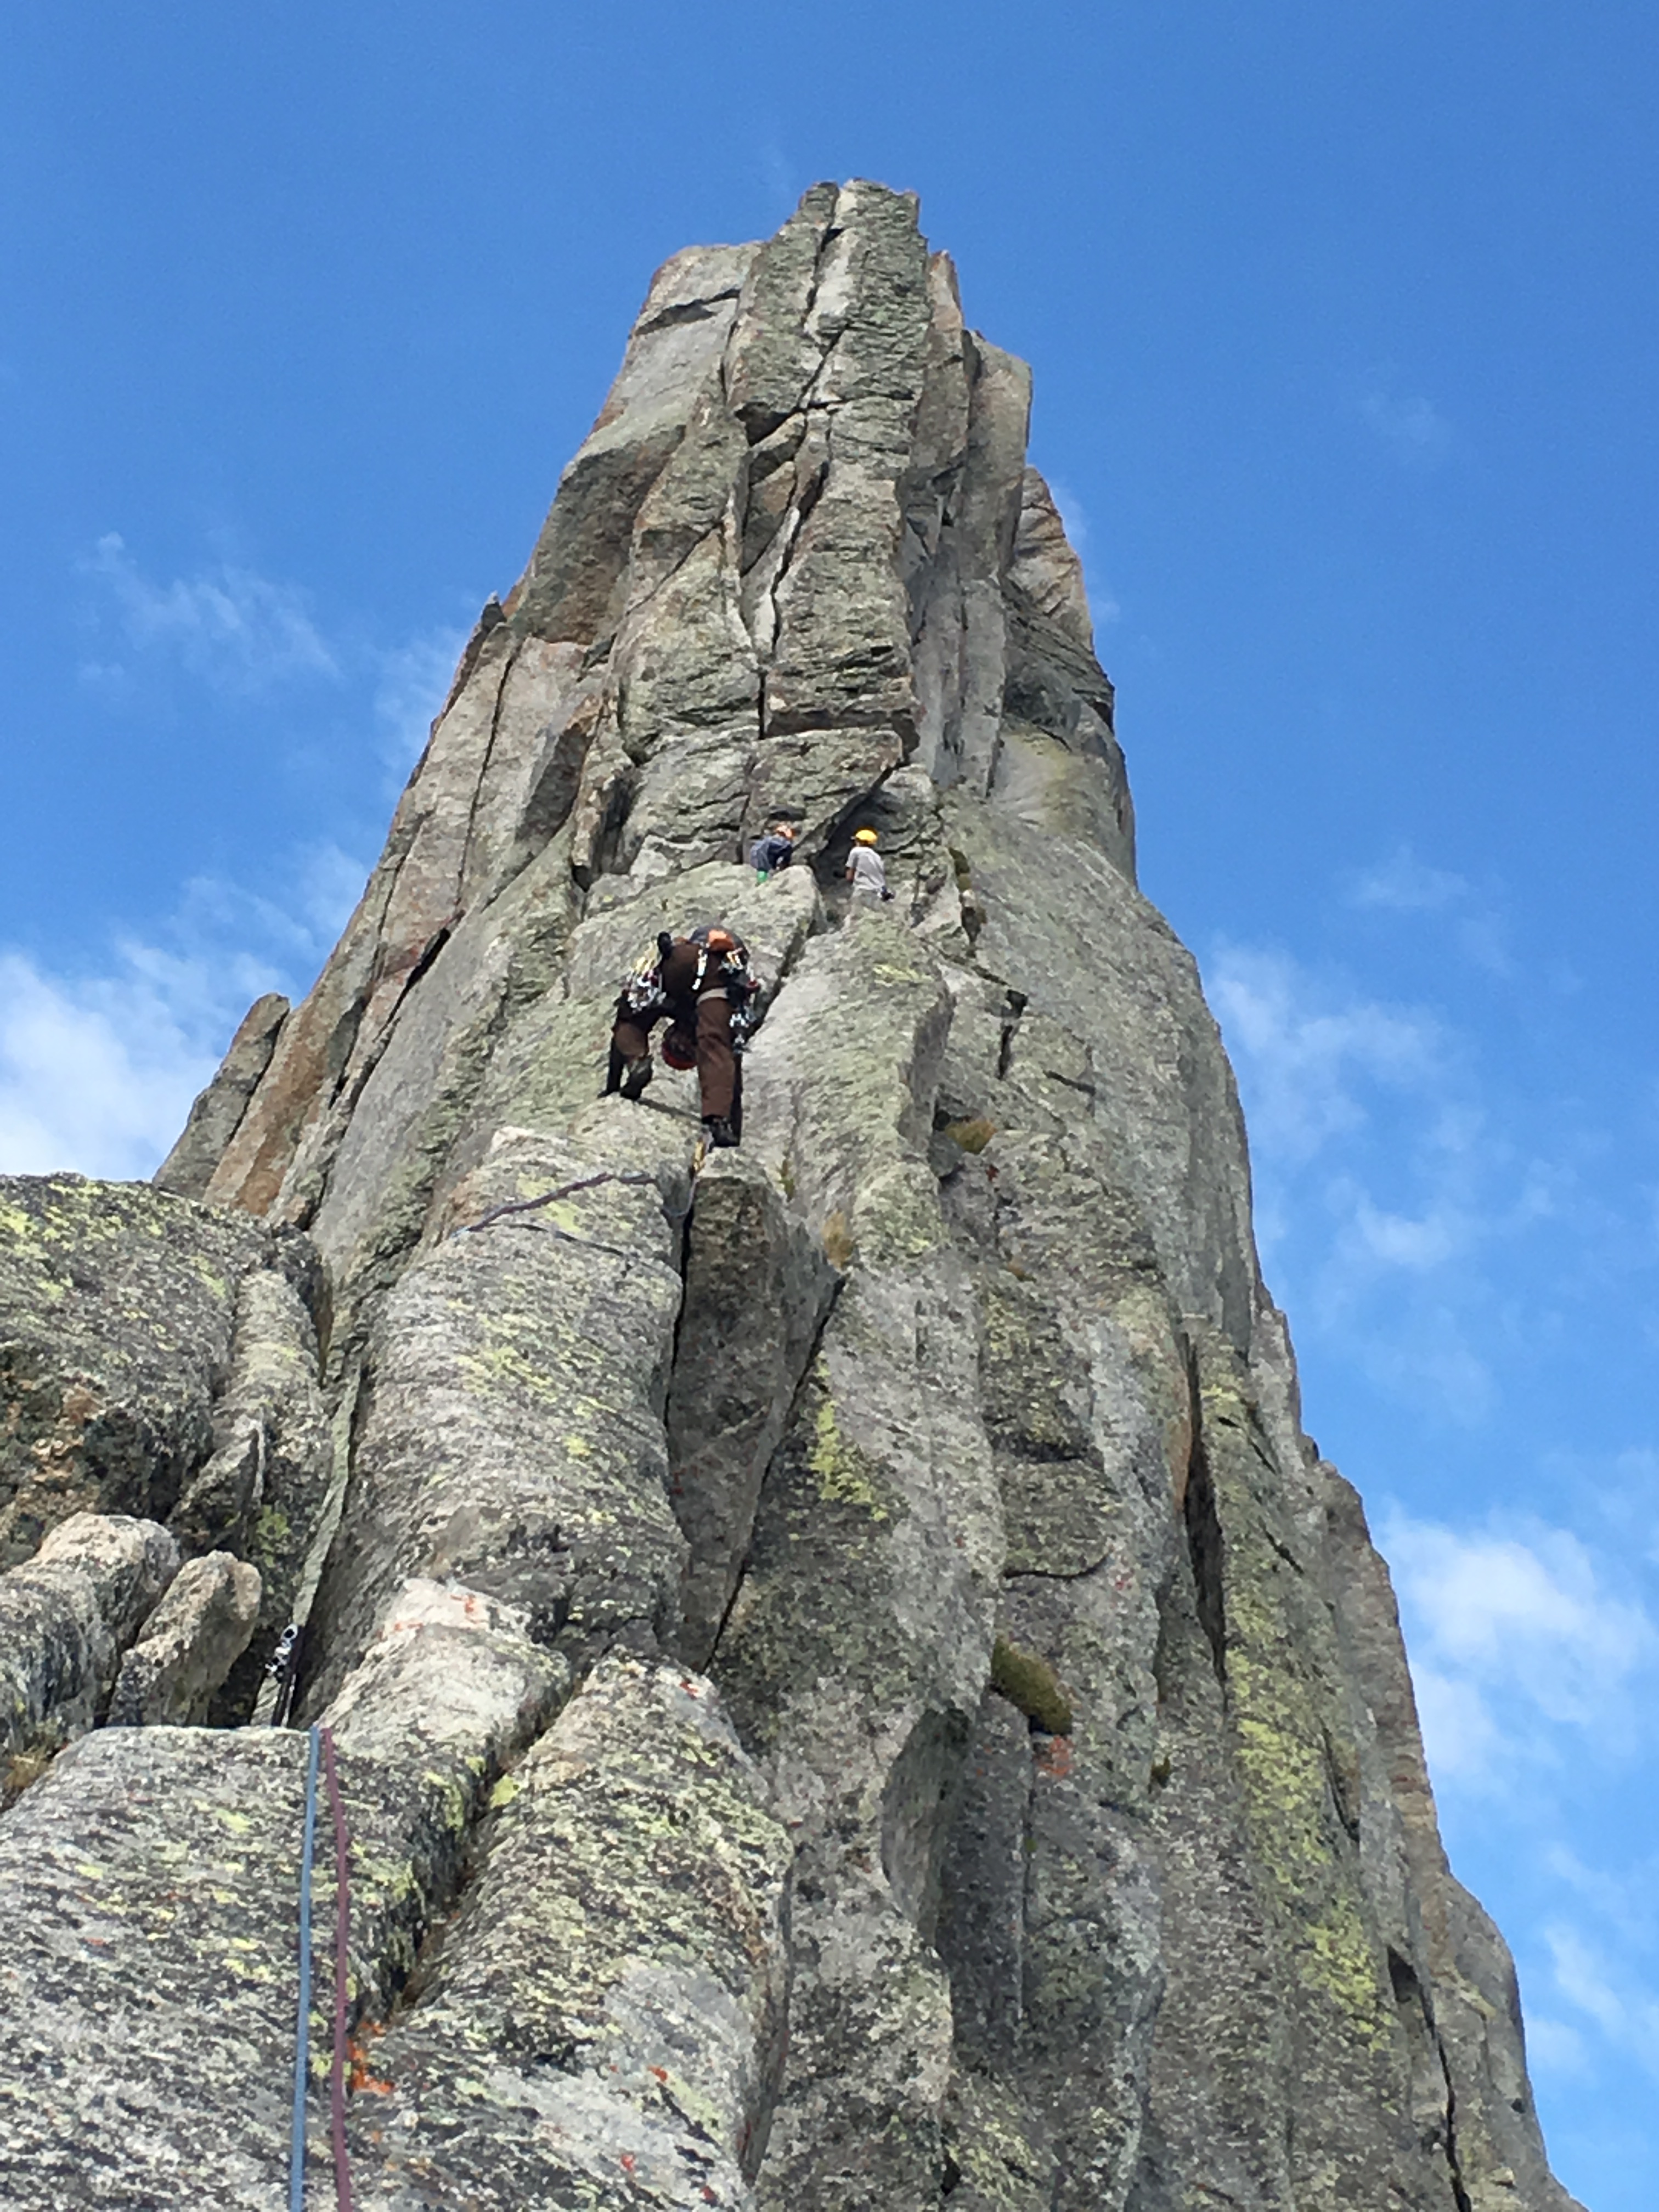
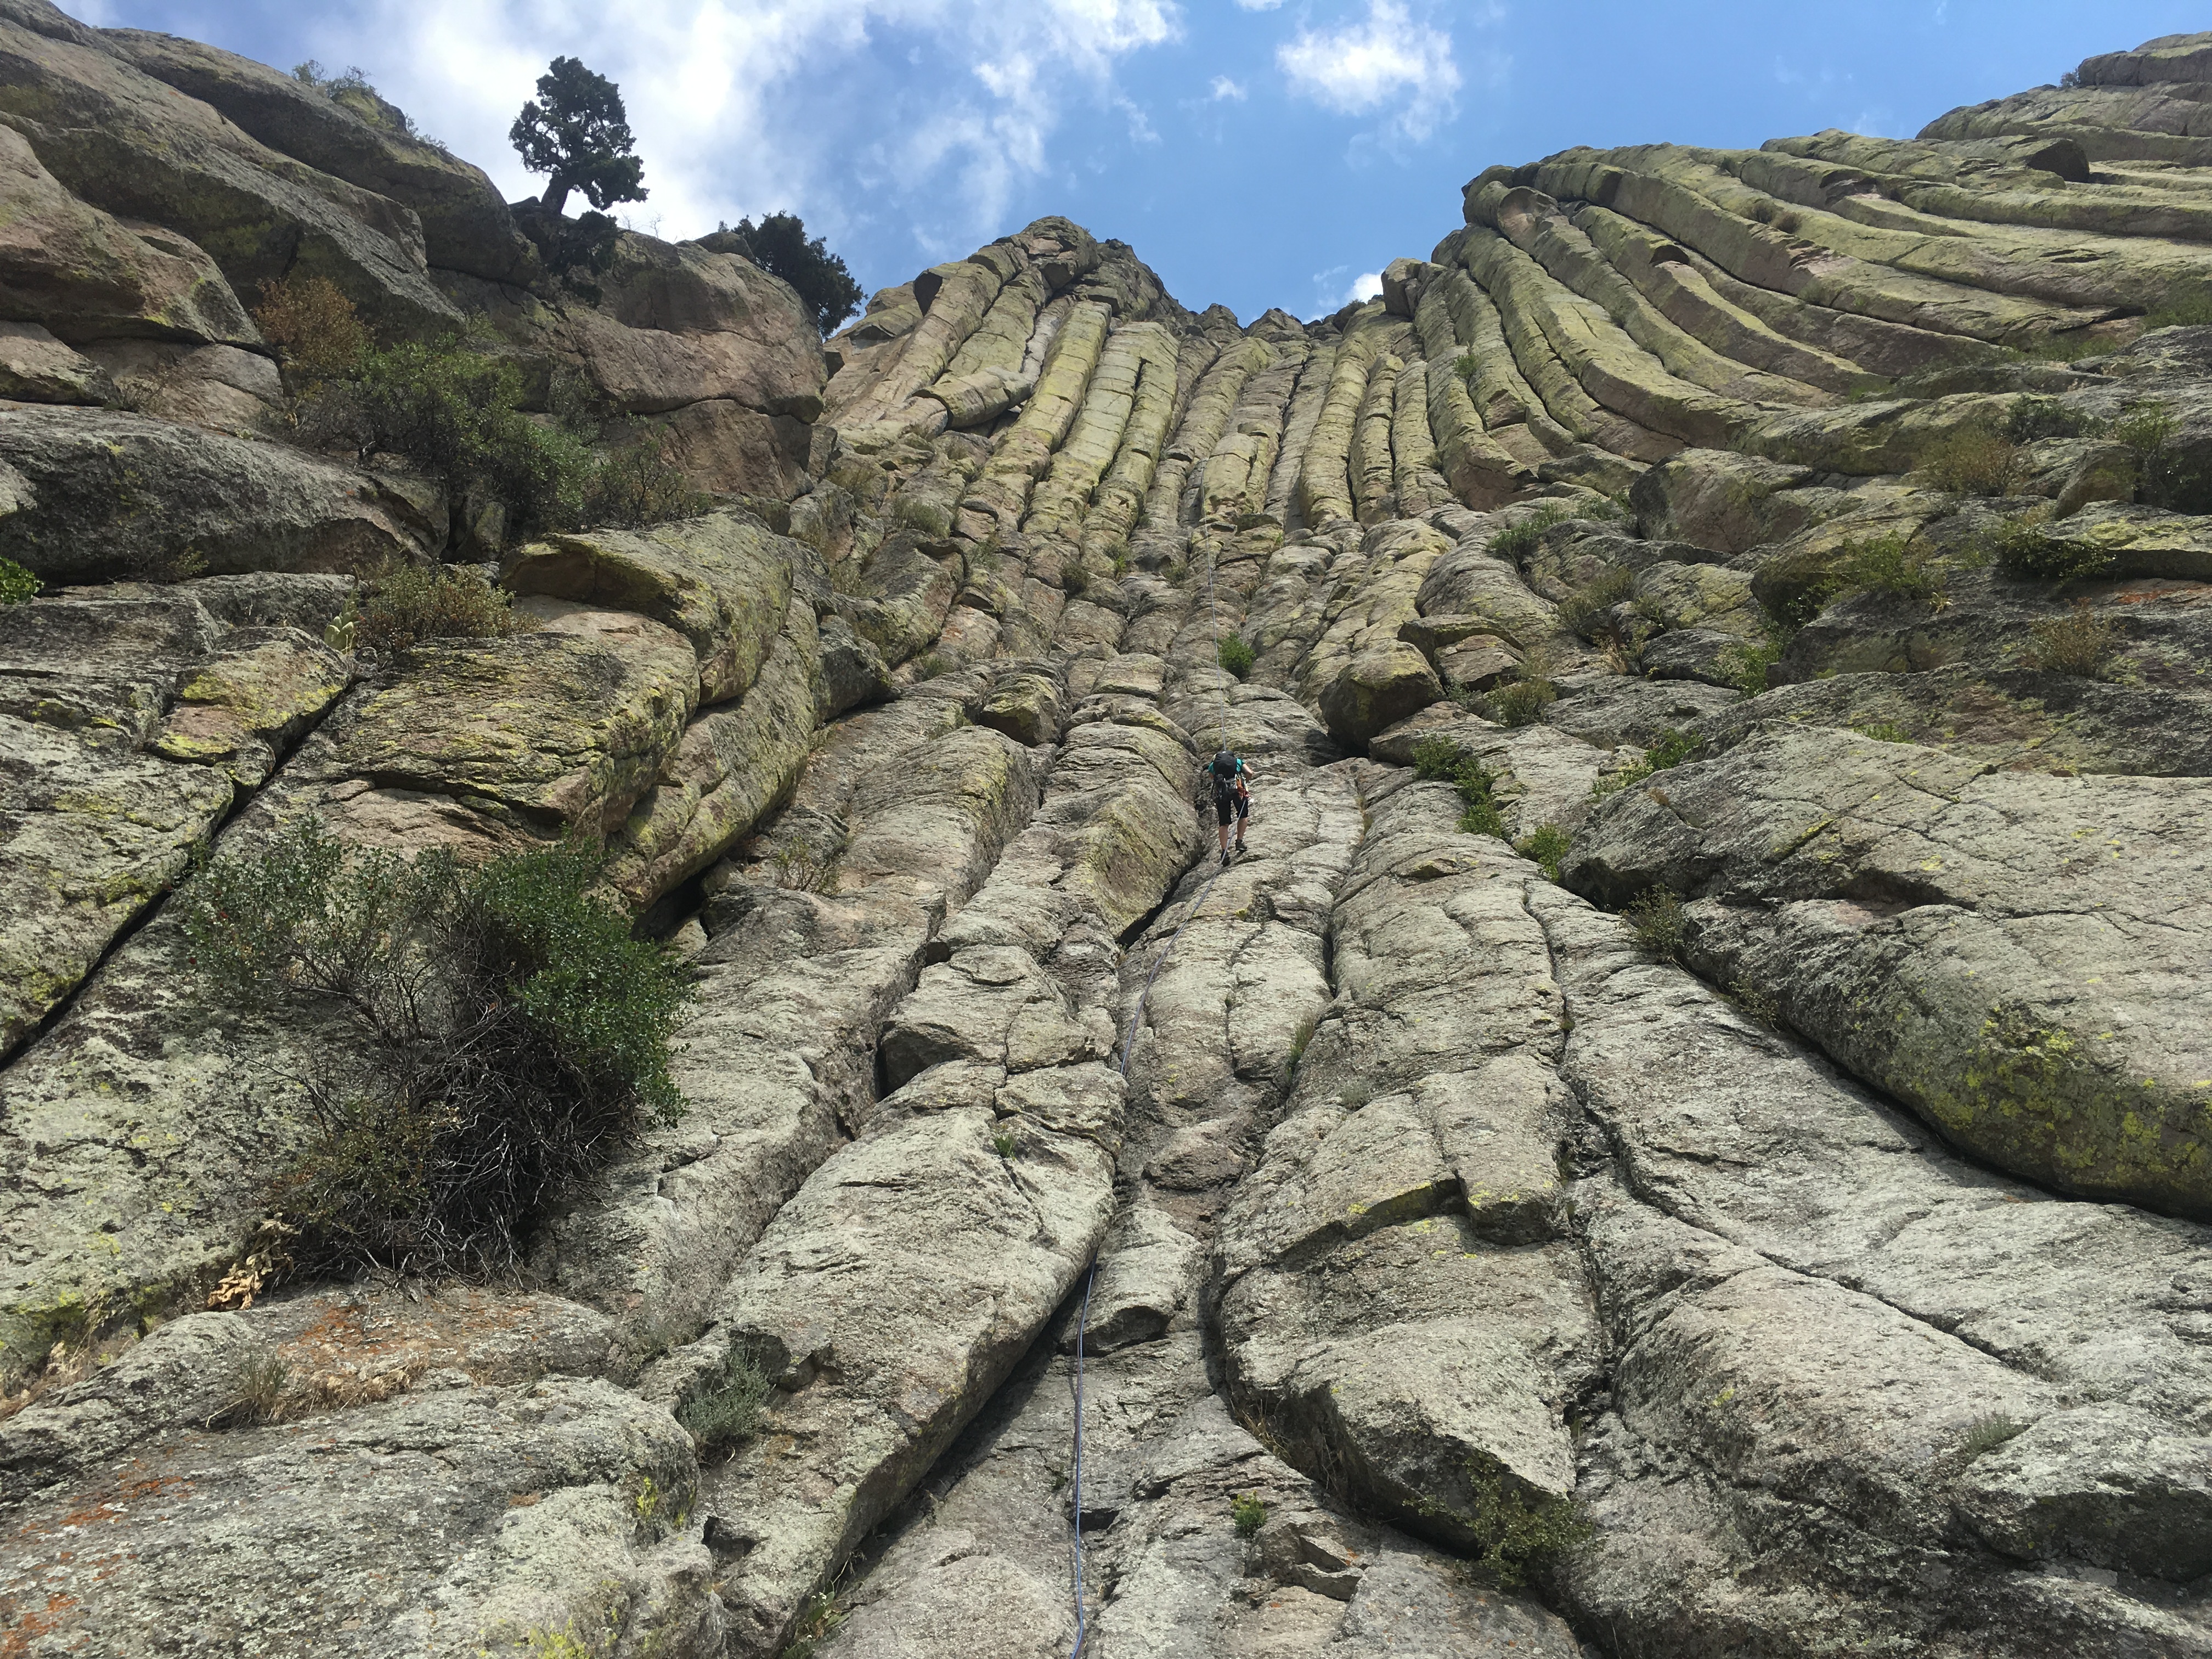
Day 2: Pingora, South Buttress with K-Crack variation (II, 5.8, 2-4 pitches) → The alarm went off at around 3am and we started hiking in the dark. Based on what we read on Mountain Project we gave ourselves an hour and a half before sunrise to get to the base of the climb at sunrise. As you follow the trail you’ll reach a folk – there are a couple of ways to gain the South Buttress, but we took a right at this fork and started scrambling up the base of Pingora – straight up the south side I think it was. We thought the scrambling was around 3rd class and pretty straight forward – just keep following the path of least resistance up and eventually you’ll reach a point where it’s obvious that the scrambling ends and the climbing starts. Looking up at this point you will see lots of options for climbs up Pingora. For the South Buttress though, look very carefully at the topo in the guidebook to find the start – here is a great picture showing the start. We followed the red line on that picture, climbing up a right-facing corner system. If you have a 70m rope, you can link the first two pitches together to get you to the base of the K-Cracks pictured below. Otherwise, unless you simul-climb you have to set up a belay station half way.
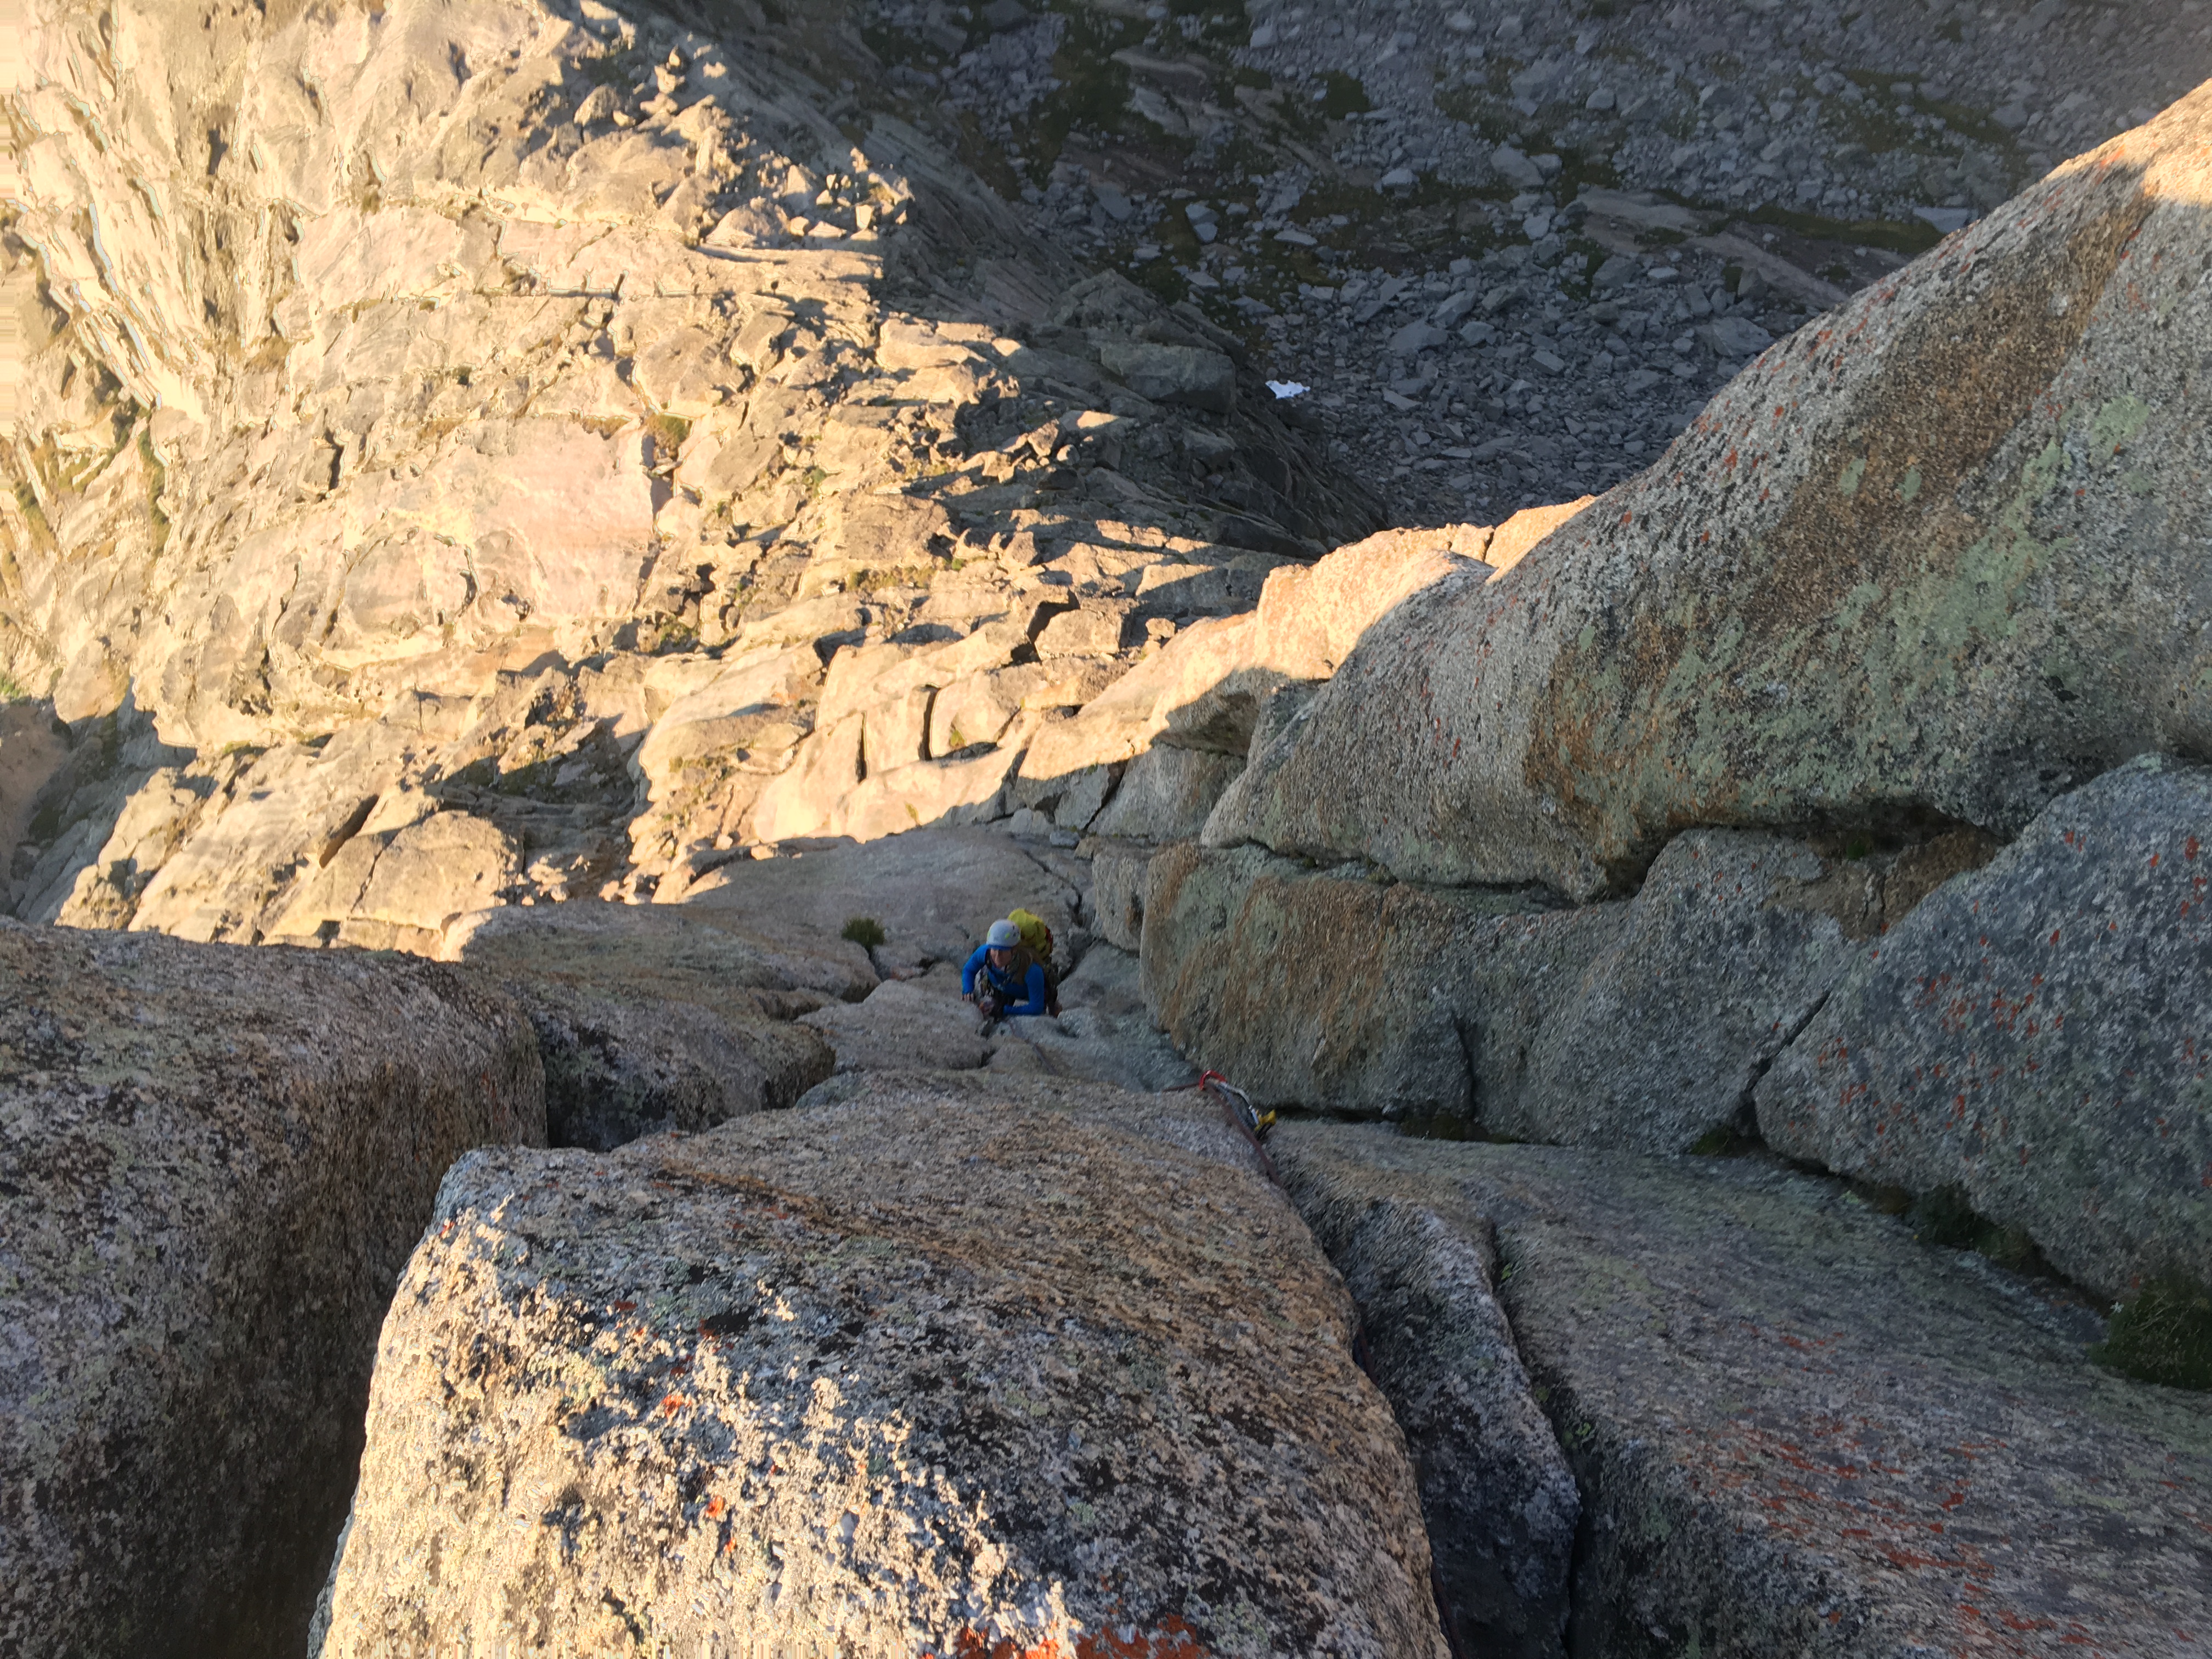

We climbed straight up the crack slightly left in the picture above – it was a beautiful splitter hand/finger crack! At the top of this pitch there is just a bit of 3rd class scrambling to get to the top. We reached the top at about 8:30am!


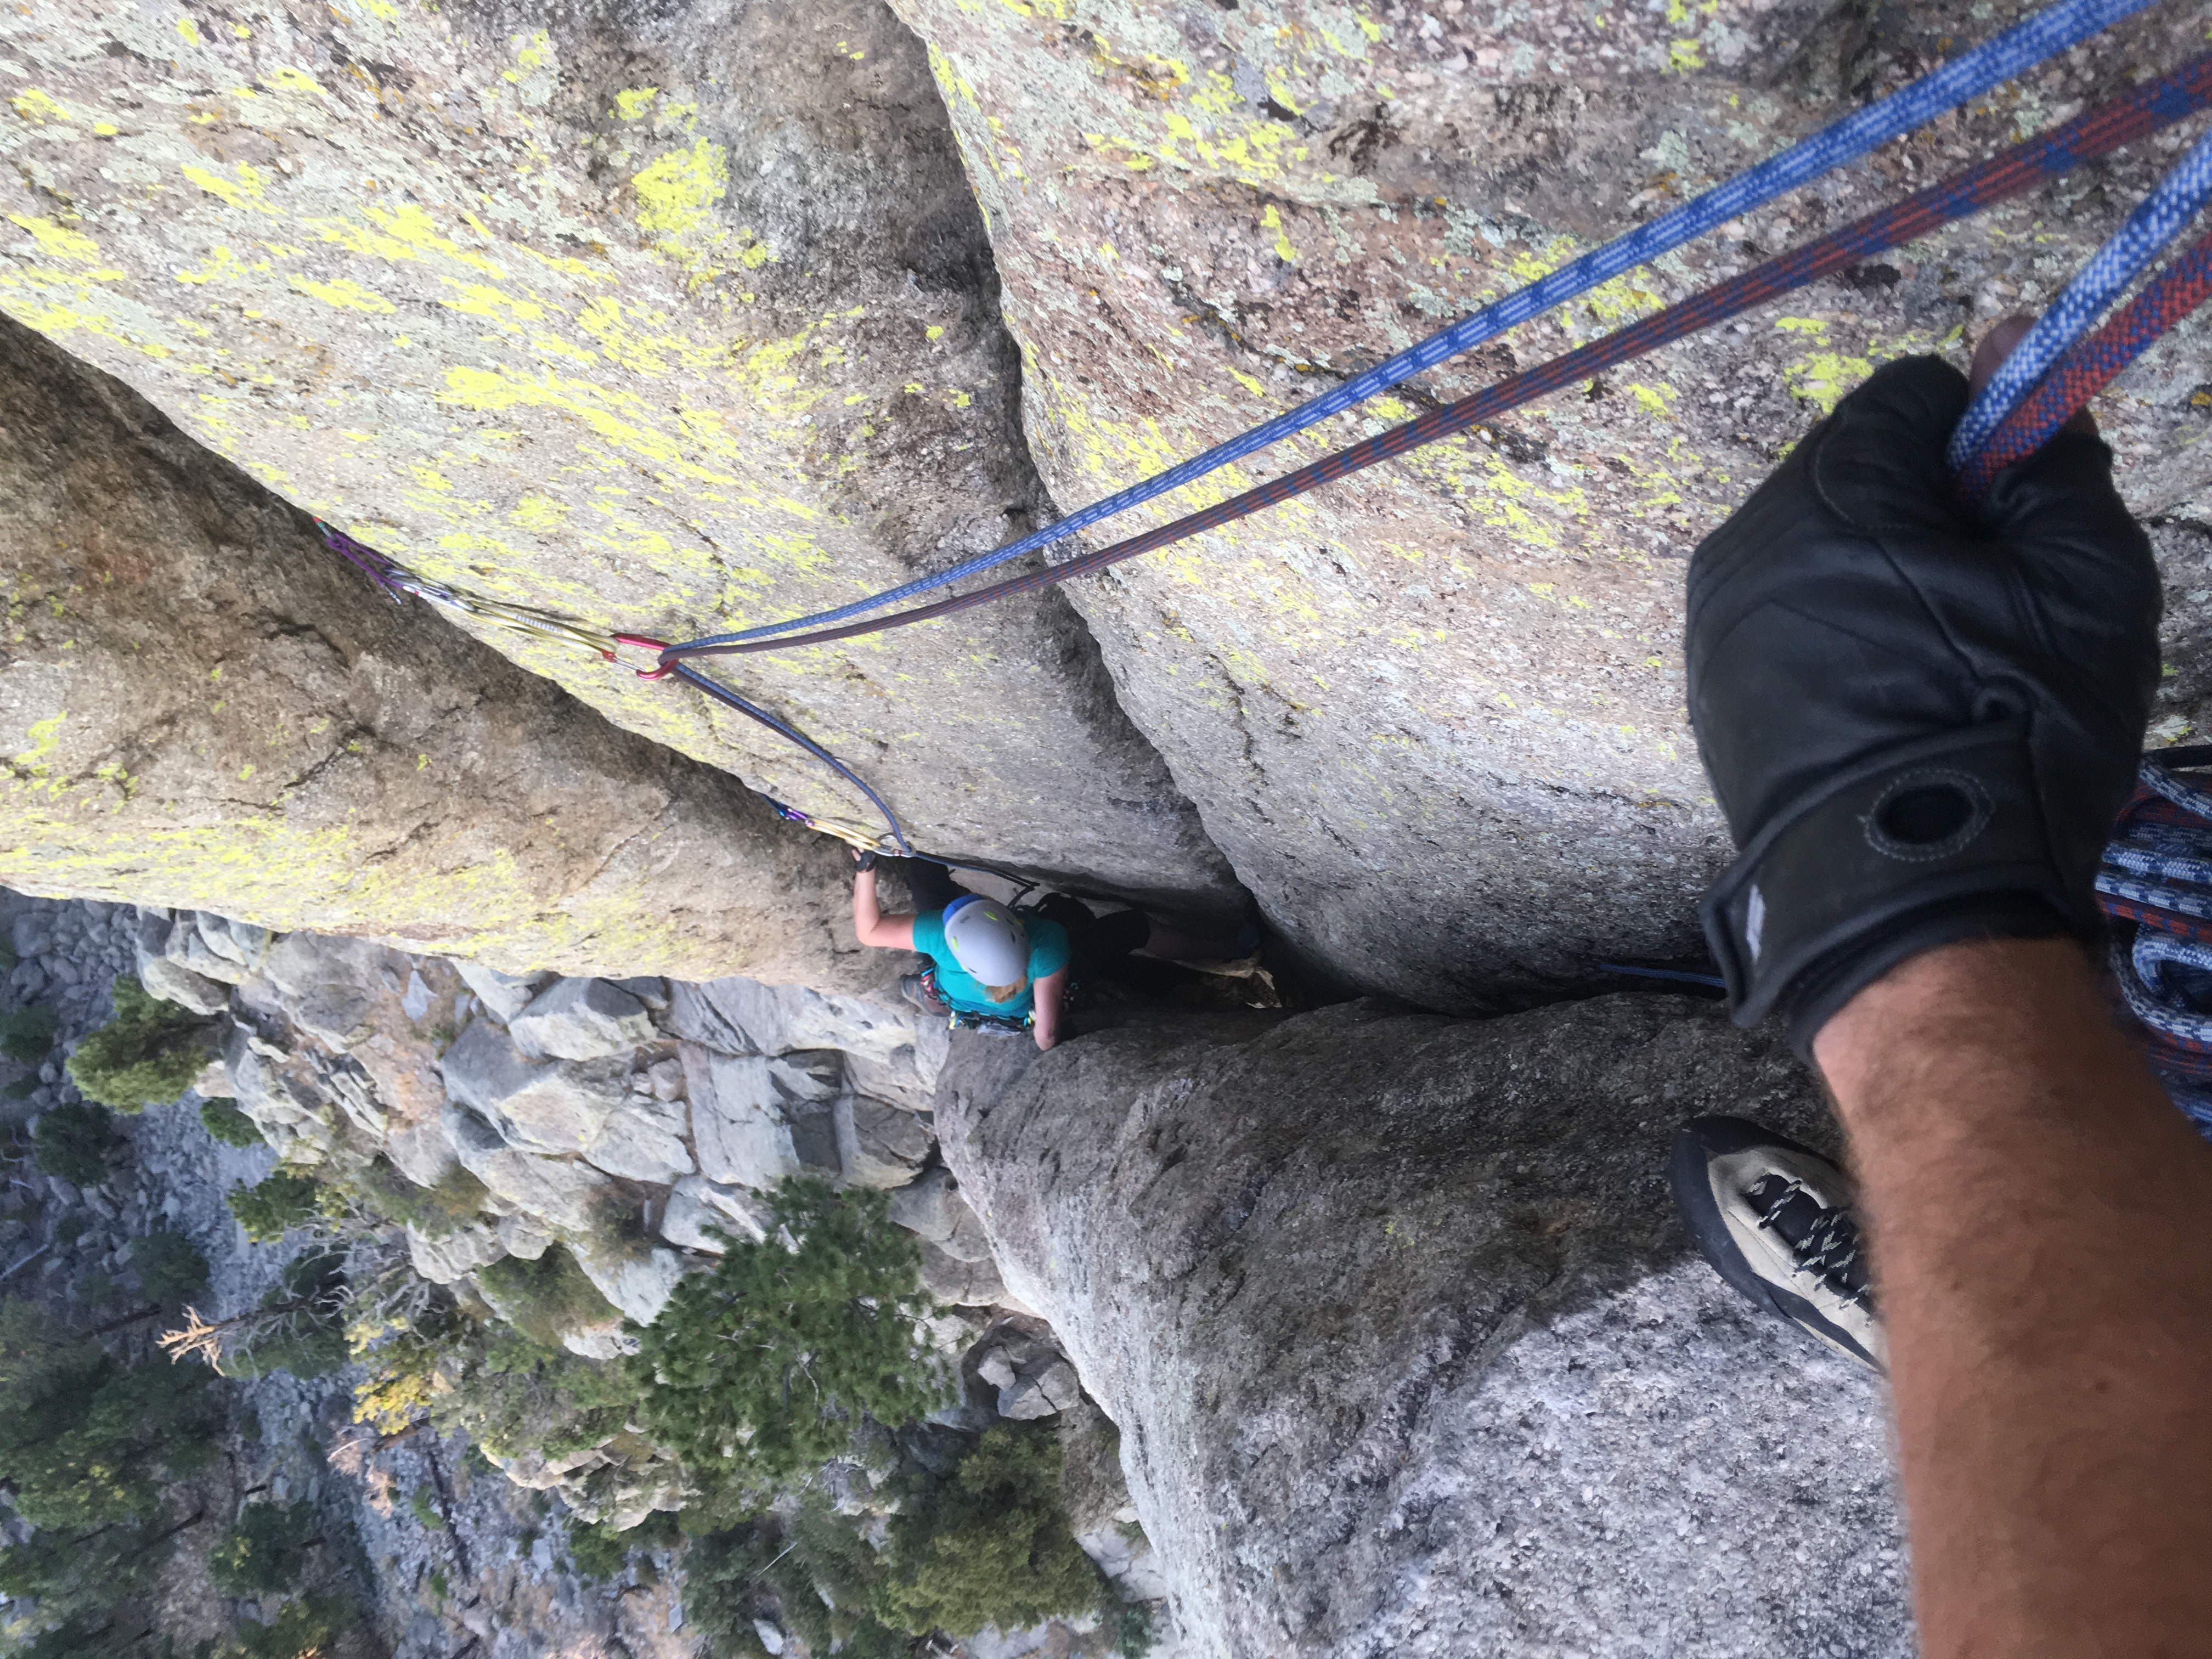
Since it was so early, Rob really wanted to go check out the West Ridge of Wolf’s Head. I thought it was late to try that route but figured it didn’t hurt to go check it out. We found a rap station heading down the west face – this is not the standard rappel down the South Buttress. That rappel is just climber’s left of the climb. I discovered this website after our trip, but have found it to be a FANTASTIC resource. This woman (Steph Abegg) has completed a ridiculous number of alpine climbs and she’s a photographer – she creates these great topos with her pictures. This is the link to only her topo for the South Buttress, which includes the rappel stations. It’s two raps to reach the notch between Pingora and Tiger Tower. The gully that the last rap drops you into is SUPER loose scree/gravel if it’s not snow filled so be careful not to slip. You would tumble for a bit! If you can, try to drop as far right/as close to the notch as possible. From this point, we found the beta to be quite confusing on what to do. We climbed down a bit and try find “the ledges” to climb across Tiger Tower but in the end we just ended up climbing up and over Tiger Tower and then rappelling down the other side toward Wolf’s Head. Since we took so long to get to this point we decided it was time to go down. There were a number of rap stations to retreat via the grassy ledges. These rappels kept trending right and were not straight down, which was kind of annoying. It didn’t help that we doubled up the rope to try to increase efficiency my skipping belays – this instead lead to inefficiencies as the rope kept getting stuck or almost stuck. This is when we realized for the rest of the trip we’re just going to use one rope to rappel. 🙂 It was super frustrating but we finally made it down the grassy ledges to Cirque Lake. We took a quick dip in the lake and then headed back to camp. Time to eat, hydrate, rest, and get ready for Wolf’s Head!


For your reference, here’s the Mountain Project link for the South Buttress for Pingora.
Day 3: Wolf’s Head, East Ridge (III, 5.6, 10+ pitches) → When I think about this climb, I smile and shake my head…!! 😬 I’d say this stands out as one of my most epic and beautiful days in the mountains to date. This is the best 5.6 I have ever climbed, although also the most exposed and terrifying 5.6 I have ever climbed! 😛 There was everything on this route: chimneys, slab, hand cracks, finger cracks, face climbing, and lots of delicate traversing. Now the guidebook doesn’t say much about this route – the number of pitches is not even listed. I think it assumes you’re going to simul-climb or solo the whole thing. According to Mountain Project there are 10 pitches – we did about 15 pitches, so there’s just a little discrepancy with respect to information out there!! Some people have reported completing the route by mid-morning, while others take 10+ hours or have been benighted. We were approximately 15 hours camp to camp I think. If you climbed Pingora first and breezed through it like we did, I’d say don’t expect the same thing out of this route. This route is more committing as there is no escape once you’re on the ridge proper, it’s harder overall even if the grade is easier, there are more pitches, and route-finding is more challenging. Do your best to keep moving quickly but safely on this route because if you take a while you could get hit with the afternoon thunderstorms. We were lucky and hit a really good weather window. Unfortunately I don’t have many pictures from the climb itself to share because we were too focused on the climbing, route-finding, etc. that we didn’t think about stopping to take pictures.
Ok, here is the breakdown:
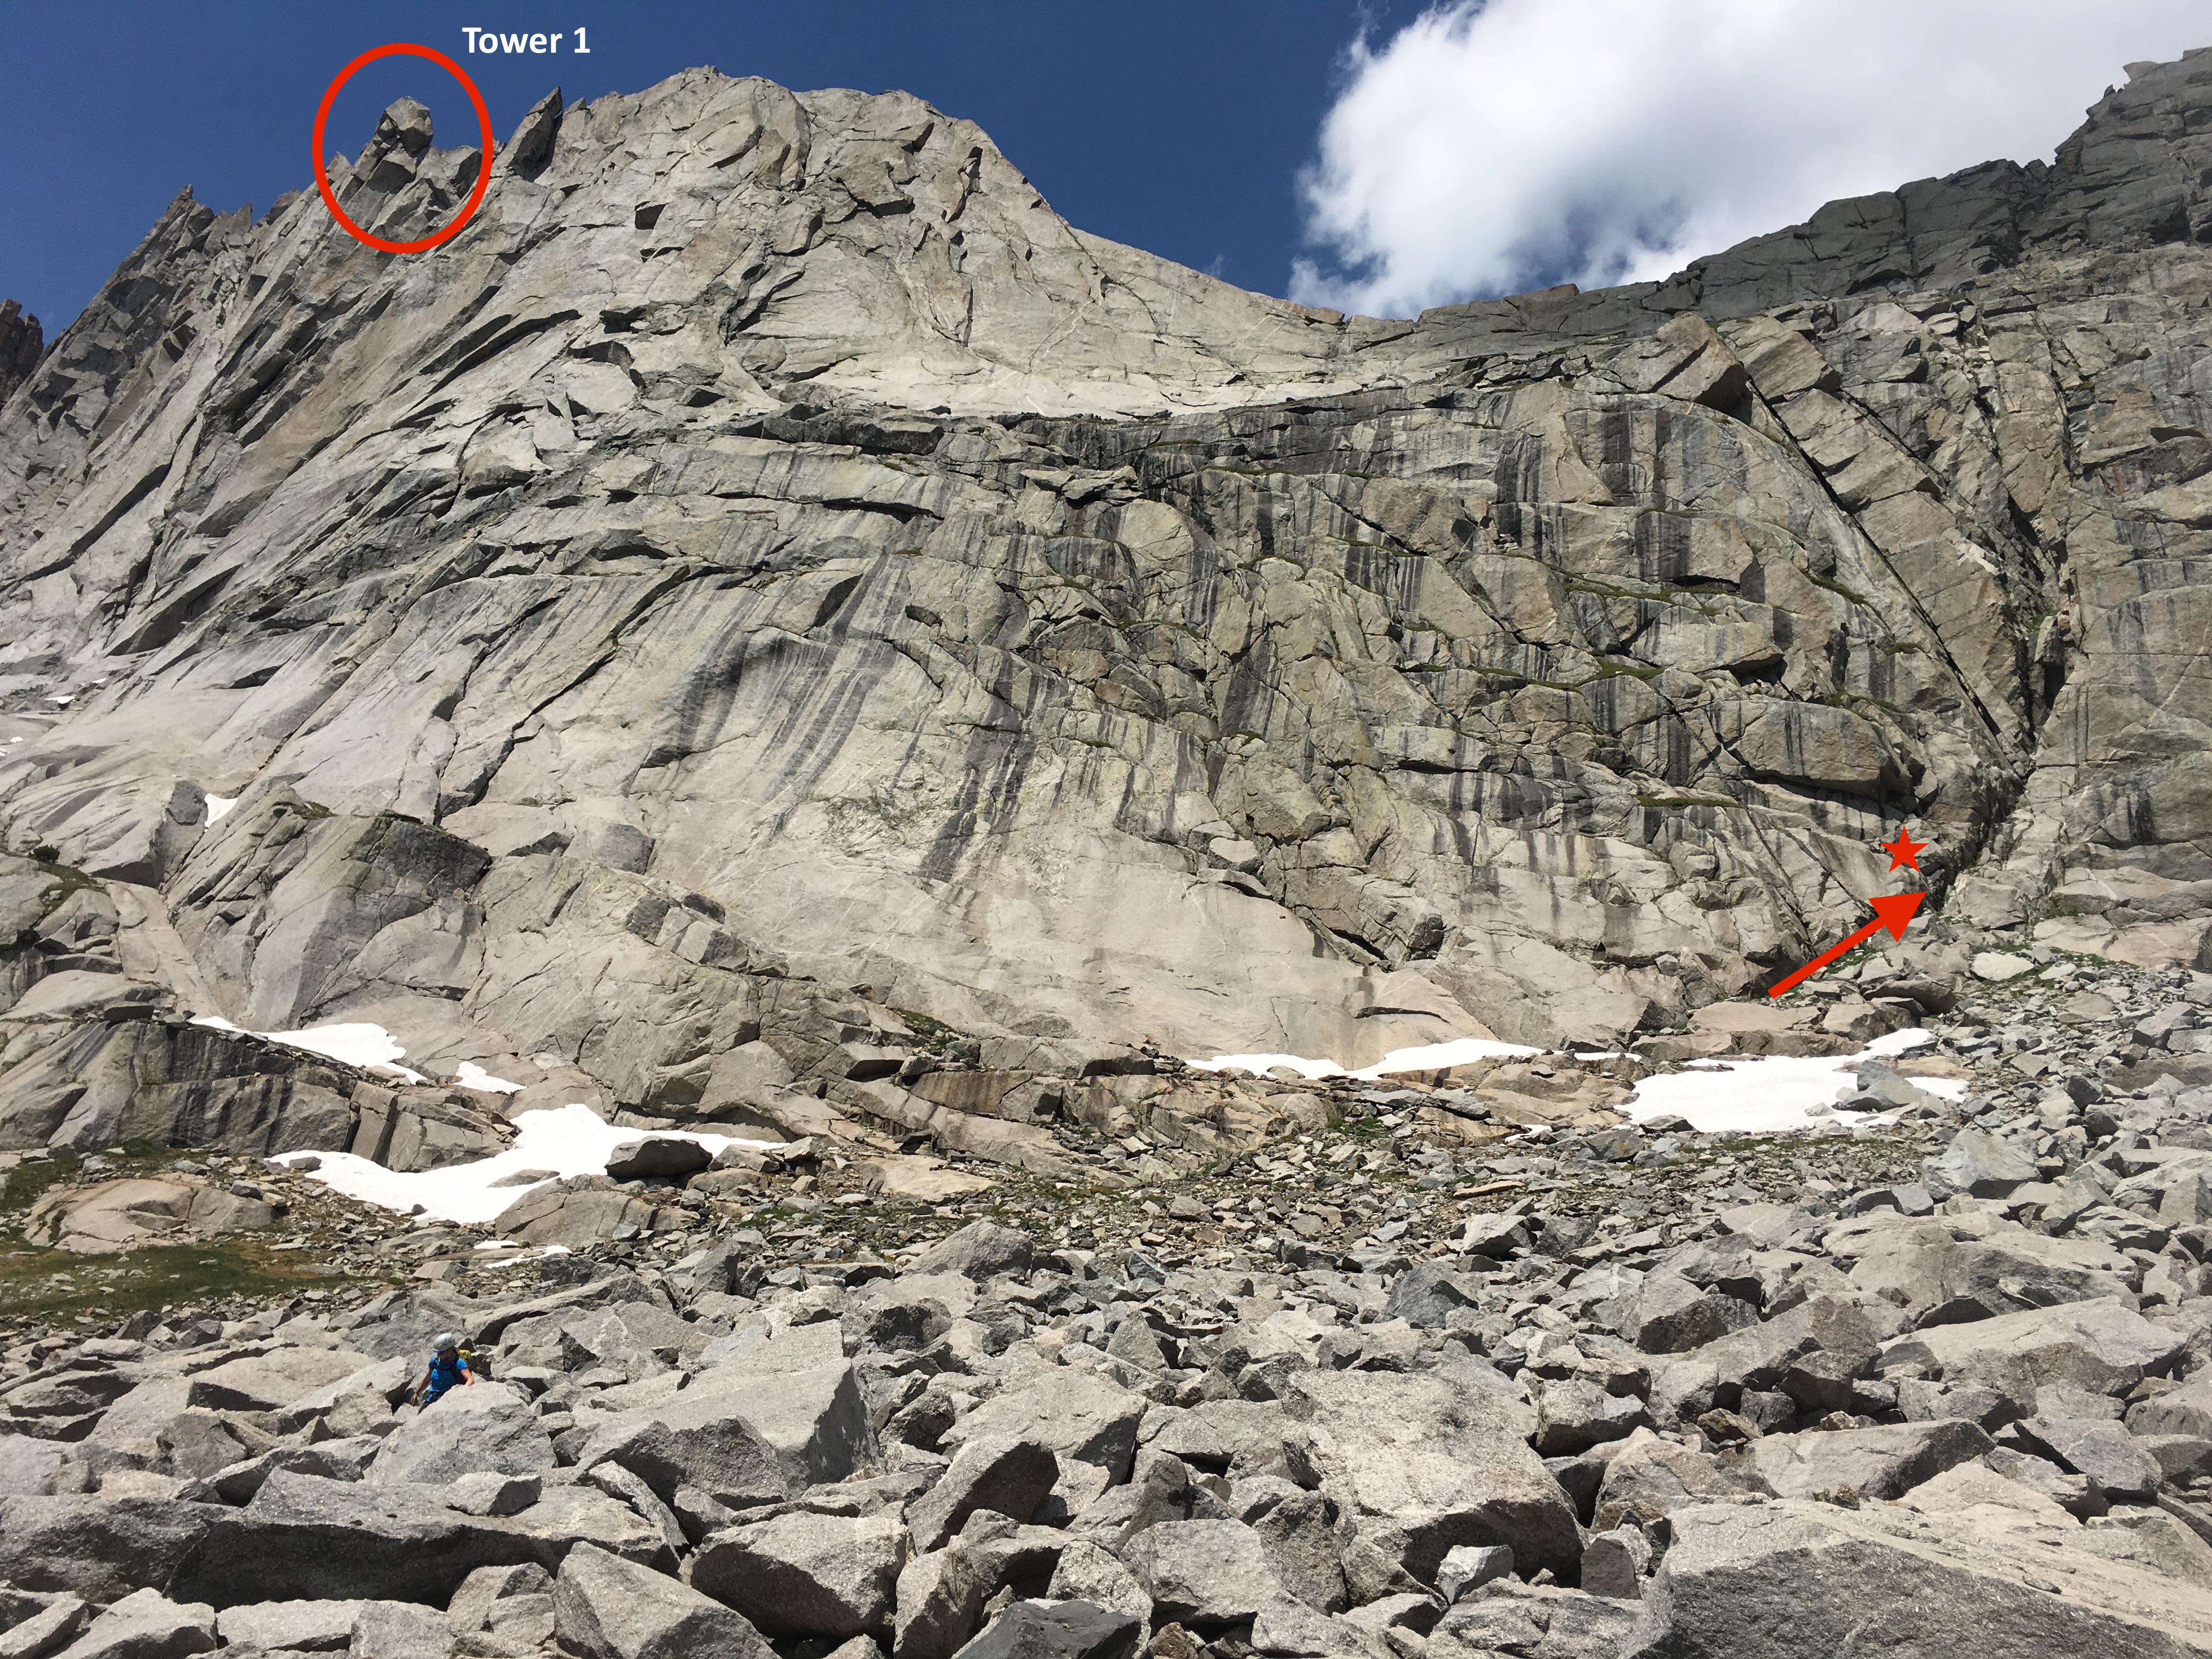
- We did the grassy ledges approach. There is quite a bit of conflicting information out there about whether it’s 3rd, 4th, or 5th class. We tried to follow the description in the Steve Bechtel guidebook but we found it hard to do so. By very closely looking at the guidebook you can find where to start – basically there is a really wet and chossy gully/chimney in front of you, near the bottom of that find a spot to climb up and left. We thought this was a 4th class move. From there on, pick your way up the grassy ledges wherever you think it goes – the ledges were grassy (Of course!😉), wet, and steep with a notable drop. We felt the moves were more like 5th class, thus we felt better roping up and pitching it out. We did a combination of regular climbing pitches and simul-climbing – this added maybe 3-4 pitches to reach the sidewalk. We did get a look at the gully approach when we were doing a little recon after climbing Pingora, but it looked loose and like it would be better if filled with snow. If you do take the gully, make sure you go up and over Tiger Tower and then rappel down the other side to reach the east ridge of Wolf’s Head. I don’t know which would be faster – I think it just depends on conditions.
- Here is a link to a very helpful topo someone drew of the route. One thing we found hard to comprehend was where we hit the “first tower” was according to this topo. We found it to be much further along the route than this topo makes it seem to be. We had already climbed a number of pitches before even reaching “pitch 1” according to this topo. Here are my additions to the topo:

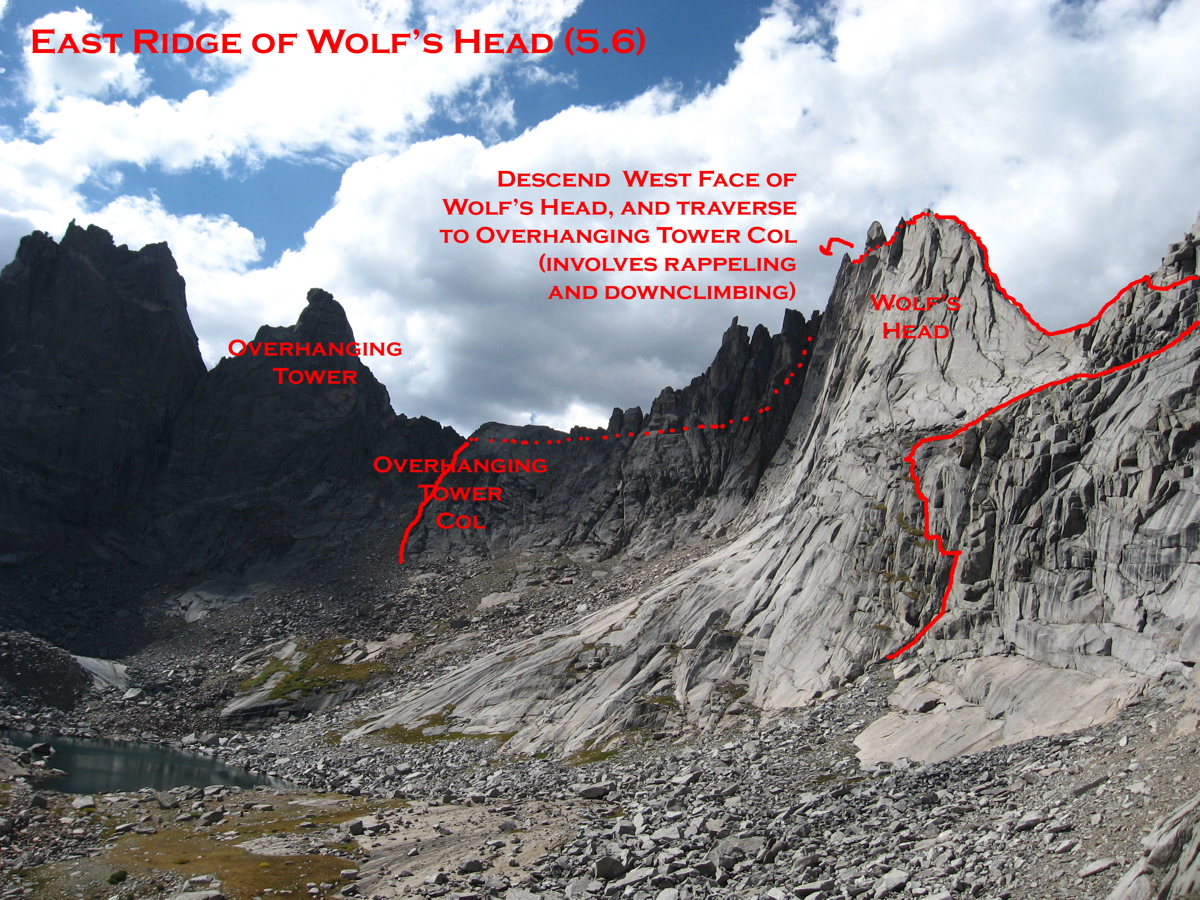
- The route does not literally traverse every little peak shown in the above picture. Here is another useful picture from Steph Abegg’s website showing a line for the descent. The dotted line means the route is behind the ridge.
- The sidewalk pitch is quite exhilarating because of the exposure but is not technically difficult. The pitch after this is quite nice and straight forward.
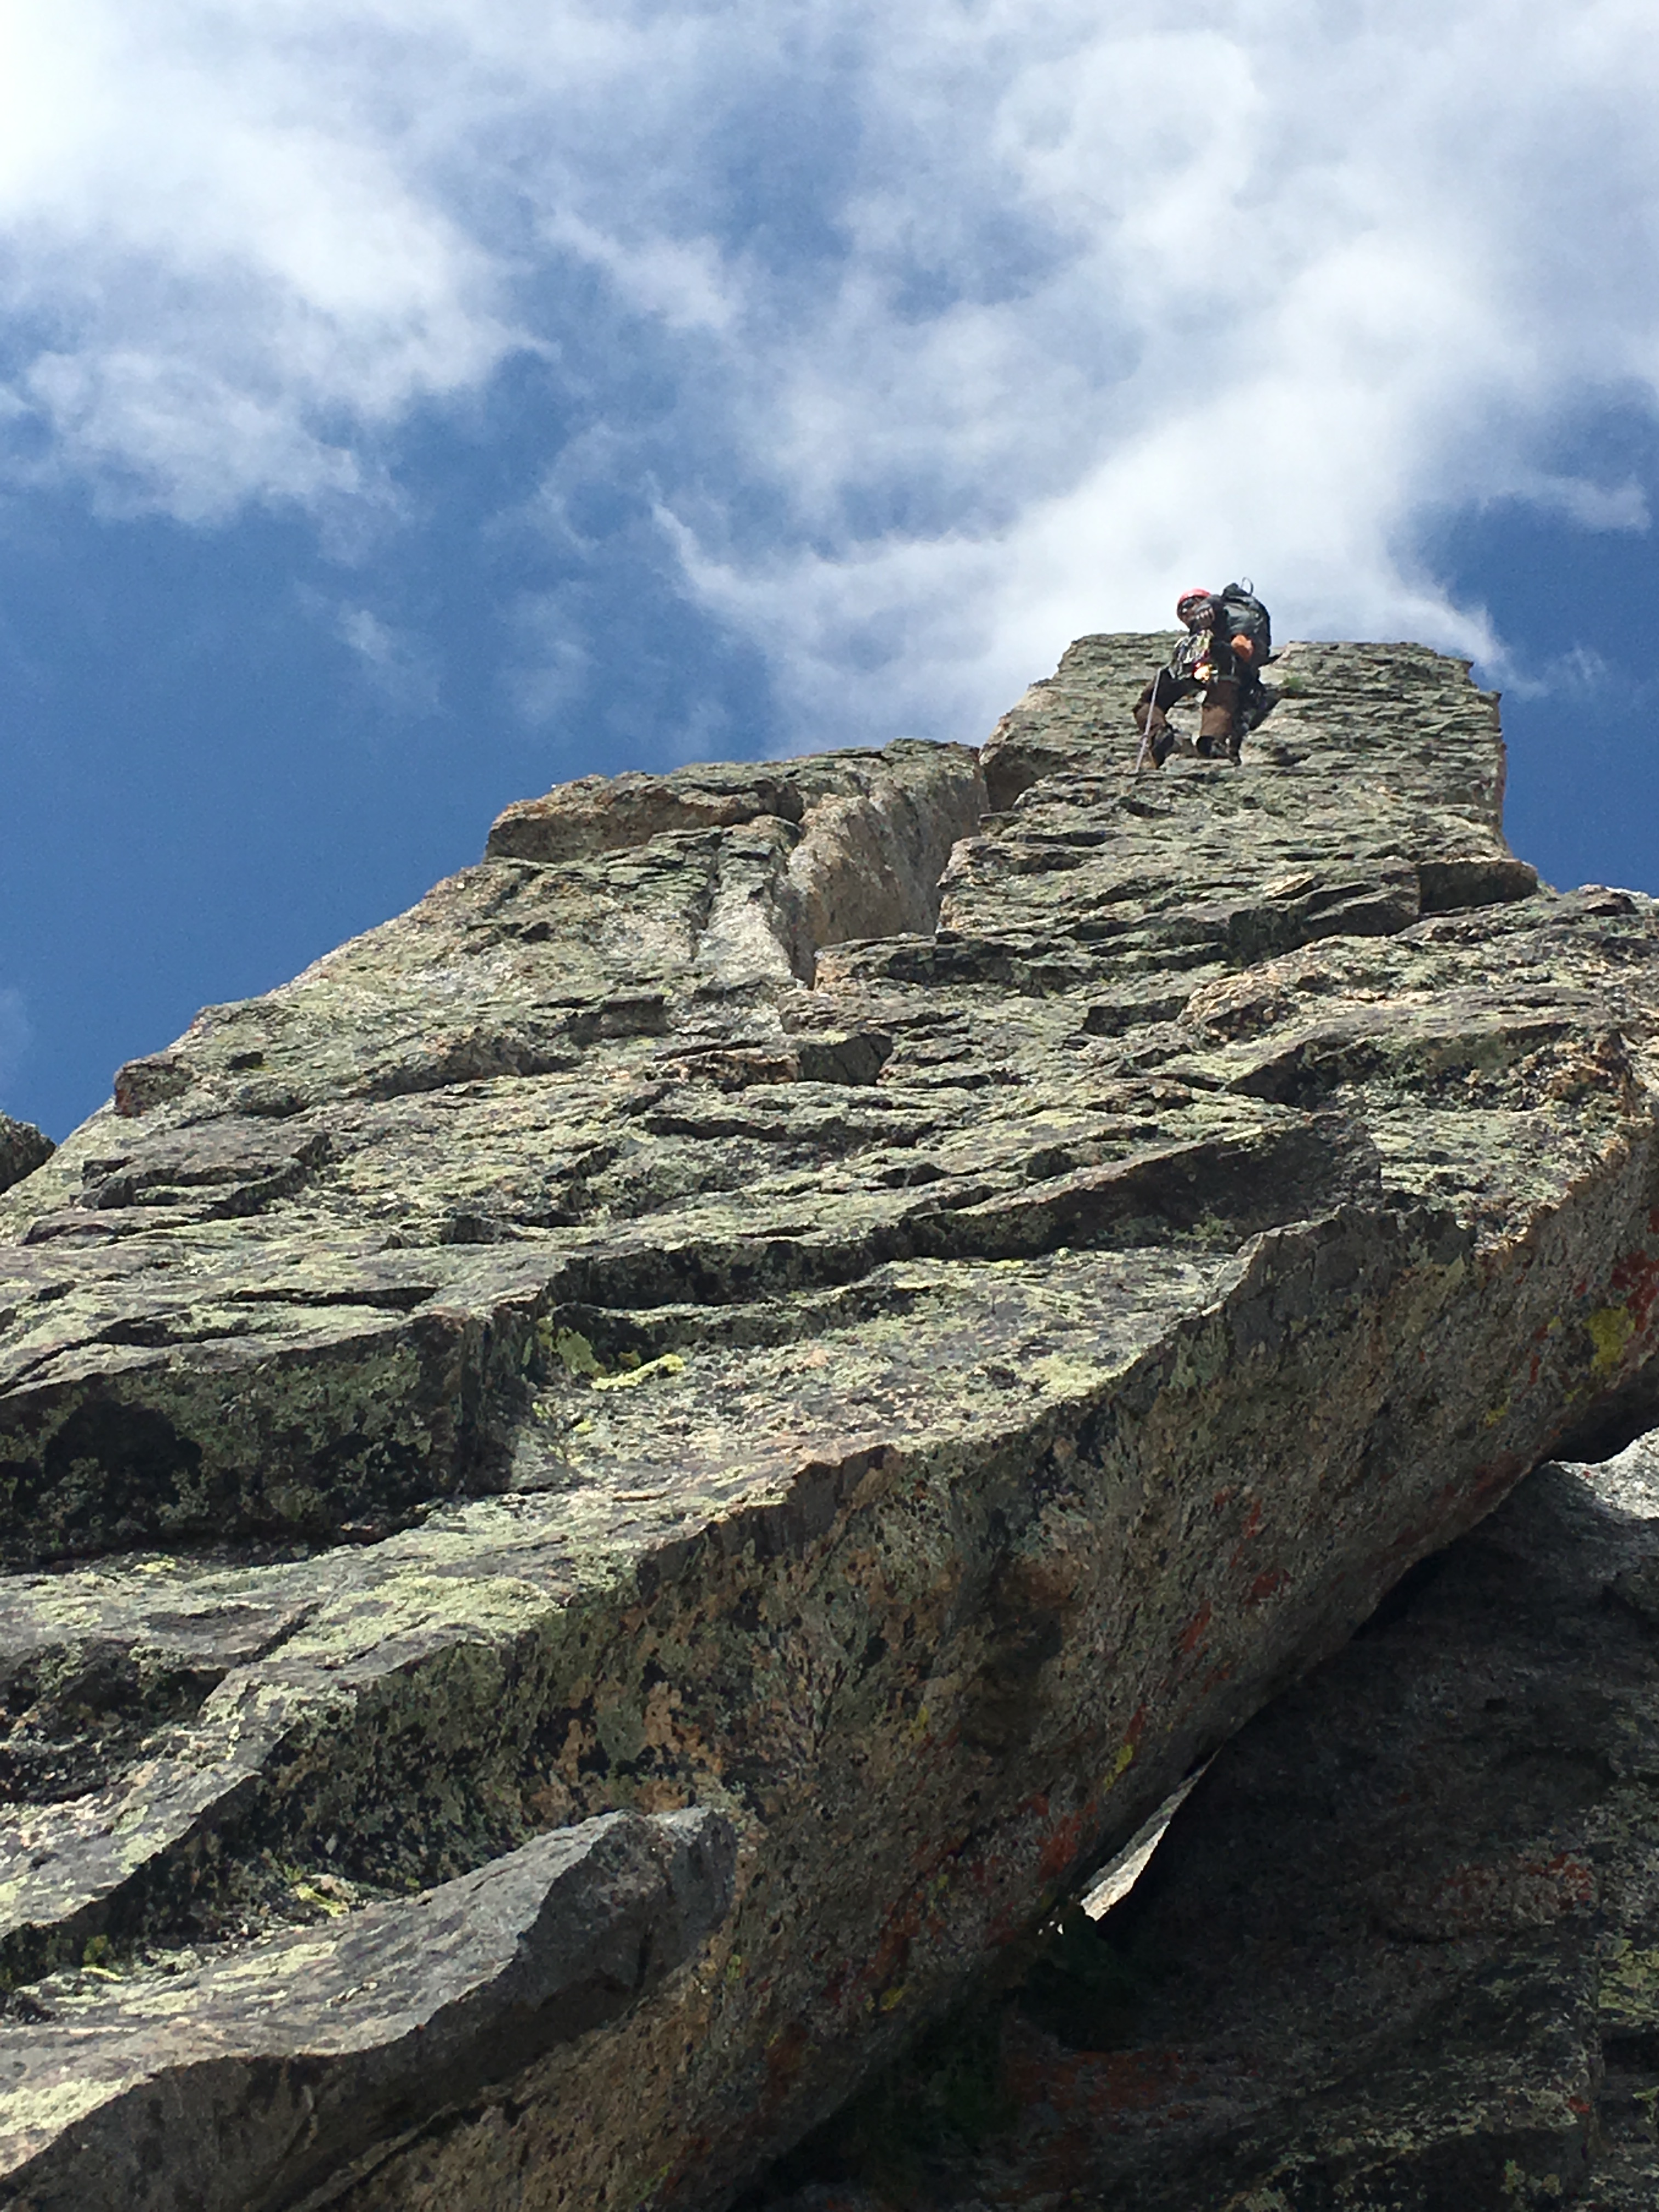
- After this pitch we thought we must be close to “Tower 1” but we definitely were not. Most beta is just assuming you think the terrain from here to the first tower is a breeze and thus not worth mentioning. We continued to pitch it out because it was exposed with high consequence so it took a while for us to reach “Tower 1” – I think we did maybe 4 pitches to get there (the sidewalk plus 3 more). It took a while to get to the first tower, it was deceptively far back and since this is a traverse you couldn’t see just how much additional climbing was needed to get to the first tower.
- Once we got to the first tower, things really started to get interesting! A lot of the most memorable climbing (though the sidewalk pitch was memorable) happened from this point onward. Mountain Project has a good description of this route and there are lots of climber comments that are good to read through, so I won’t take the time to copy what they have said. Here are some other links to check out:
- http://www.supertopo.com/tr/South-Buttress-of-Pingora-and-East-Ridge-of-Wolfs-Head-Linkup/t12247n.html
- http://www.stephabegg.com/home/tripreports/wyoming/cirqueoftowers
- https://www.youtube.com/watch?v=DRKYXBJQbTE
- https://www.youtube.com/watch?v=ZmotC_FKyTg
- https://www.youtube.com/watch?v=w0qA5yA-JV8
Day 4: Hike out (9 miles, 6 hours) → Obviously there are no surprises on the hike out since we did it on the way in, but as I mentioned earlier, when descending to Arrowhead Lake I’d take the high trail to your right under War Bonnet. Anticipate getting back to the vehicle will take a while given the distance, that you’ll be tired, and that your packs will still be pretty heavy.
Well, I’d say “that’s a wrap!”
My key takeaways: Don’t get too confident in your abilities while looking at the guidebook for the Cirque – sure there are “easier routes” but I’d say it’s not a place for beginners. You should have solid general mountains skills and experience before climbing here, and be at least a 5.9 trad leader before leading here. I was really nervous about climbing here, especially on Wolf’s Head because based on my research, I had a feeling it was going to be our most challenging alpine climb yet. It was in fact challenging, but not outside our abilities, which is what you want! We put our game faces on and just got it done. Once my game face was on I was surprised by how well I climbed and how calm I remained. Remaining calm is something I’ve been working on since I started adventuring in the mountains and I think it’s good to keep working on it. You won’t be able to push yourself outside your comfort zone safely if you don’t remain calm. No one thinks clearly when they get too anxious.
This reminds me of an Amy Cuddy quote (author of the book “Presence: Bringing your Boldest Self to your Biggest Challenges“):
When we are present, we approach our biggest challenges with excitement instead of fear, act with self-assurance instead of anxiety, and leave with satisfaction instead of regret.
Beautifully said! So get on out there and climb a mountain that might make you anxious, but don’t let it do so.
Keep on rockin’ 🗻
J.


