Date of Trip: July 19th – 23rd, 2016
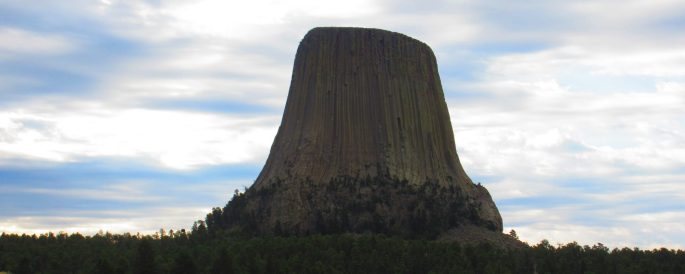
Devils Tower…where to begin! I didn’t know this feature existed until Rob mentioned it this past spring. It’s a magical place if you ever get a chance to visit it. This national monument is rich in history and is a sacred place to many: read more here. It’s a very popular tourist destination, so be prepared to have an audience and be bombarded with questions when you get down, but the climbs on this tower are well worth your visit!
In summary: The routes we climbed were Tad (5.7), El Cracko Diablo (5.8), Durrance (5.7 + Bailey Direct finish at 5.8) and Soler (5.9). In general, we found the climbing to be harder for the grade: the climbs were long, more physical in nature, and sustained. I’d say it would be best to be a solid 5.9 trad leader before deciding to lead at Devils Tower.
Gear: Since the climbs can be so long, you’ll want to consider this when deciding what gear to bring. We climbed with a double rack and even added some extra cams – worked out to triples of 0.5-2. Having some Omega Pacific Link cams comes in handy! 🙂 For the Durrance route we brought a BD Camalot C4 and C5, which is recommended and Rob placed them since we had them, but others do get by without these and still climb the route safely. Your own research on the route, skill, and comfort level will dictate this. We brought a 70m rope which worked for all of these climbs and rappels. If you have a shorter rope that you were hoping to bring, check the climbs and rappels to make sure it’s long enough.
A few general tips about the area to start:
- Devils Tower is not a city or town itself, thus there’s not much for amenities there. The closest actual town with a grocery store is Hulett, which is about 10 miles northeast. It’s a small store but has everything you need.
- There is a campground (Belle Fourche Campground) in the park and it’s first come, first serve. Best/easiest to have cash on hand to pay. This campground has running water and actual washrooms – no showers though.
- Devils Tower Lodge is another option for accommodation – it’s owned and run by Frank Sanders, a climbing legend in the area, known for establishing many of the routes on the tower. This is also where you can hire a guide if you’d like. The guides and people who run this lodge are very friendly and love talking about the climbs on the tower.
- You have to register each time you climb the tower and check in when you get back. There is a climbing office staffed with a climbing ranger (who has climbed the tower) – they’ll be happy to chat with you about the climbs and provide some insights. They are not in the office for the same hours as the visitor centre though – probably only like 8am-3pm? It varies depending on if they get any calls to attend to. At the time we were there they held a “Climber’s Coffee” social every Sunday morning – free coffee and a chance to chat with other climbers.
- The guidebook can be purchased at the Devils Tower Trading Post and the visitor centre. On our first day, however, we got into some trouble trying to follow a rappel route described in the book (Don’t try to do the “Rainy Day” rappels!). We later learned from the locals that a set of bolts on that rappel route are no longer there, which is why we ran into so much difficulty, so take the information from the book with a grain of salt. I think it’s a good start to learn about the area, and then supplement the book with information obtained from your own online research and from talking to the locals/other climbers/climbing ranger.
- Be very careful when pulling your rope on rappel – these cracks can eat up your rope really easily! We were advised to avoid putting knots in the end for this reason because the knots can get stuck in the cracks when you throw the rope. I’m not advocating you do this because I don’t think it’s best practice to do so, but it’s up to you to decide what you’re comfortable with. We often sent the first person down with the ropes attached to their harness, letting out the rope as they went down instead of throwing it down. Our rope is very clearly marked in the middle and we knew 70m would be fine for all our rappels. Make sure you know the distance of your rappels to ensure you have enough rope, clearly mark your rope in the middle, use a prussik, and rappel slowly keeping an eye on the end of the rope.
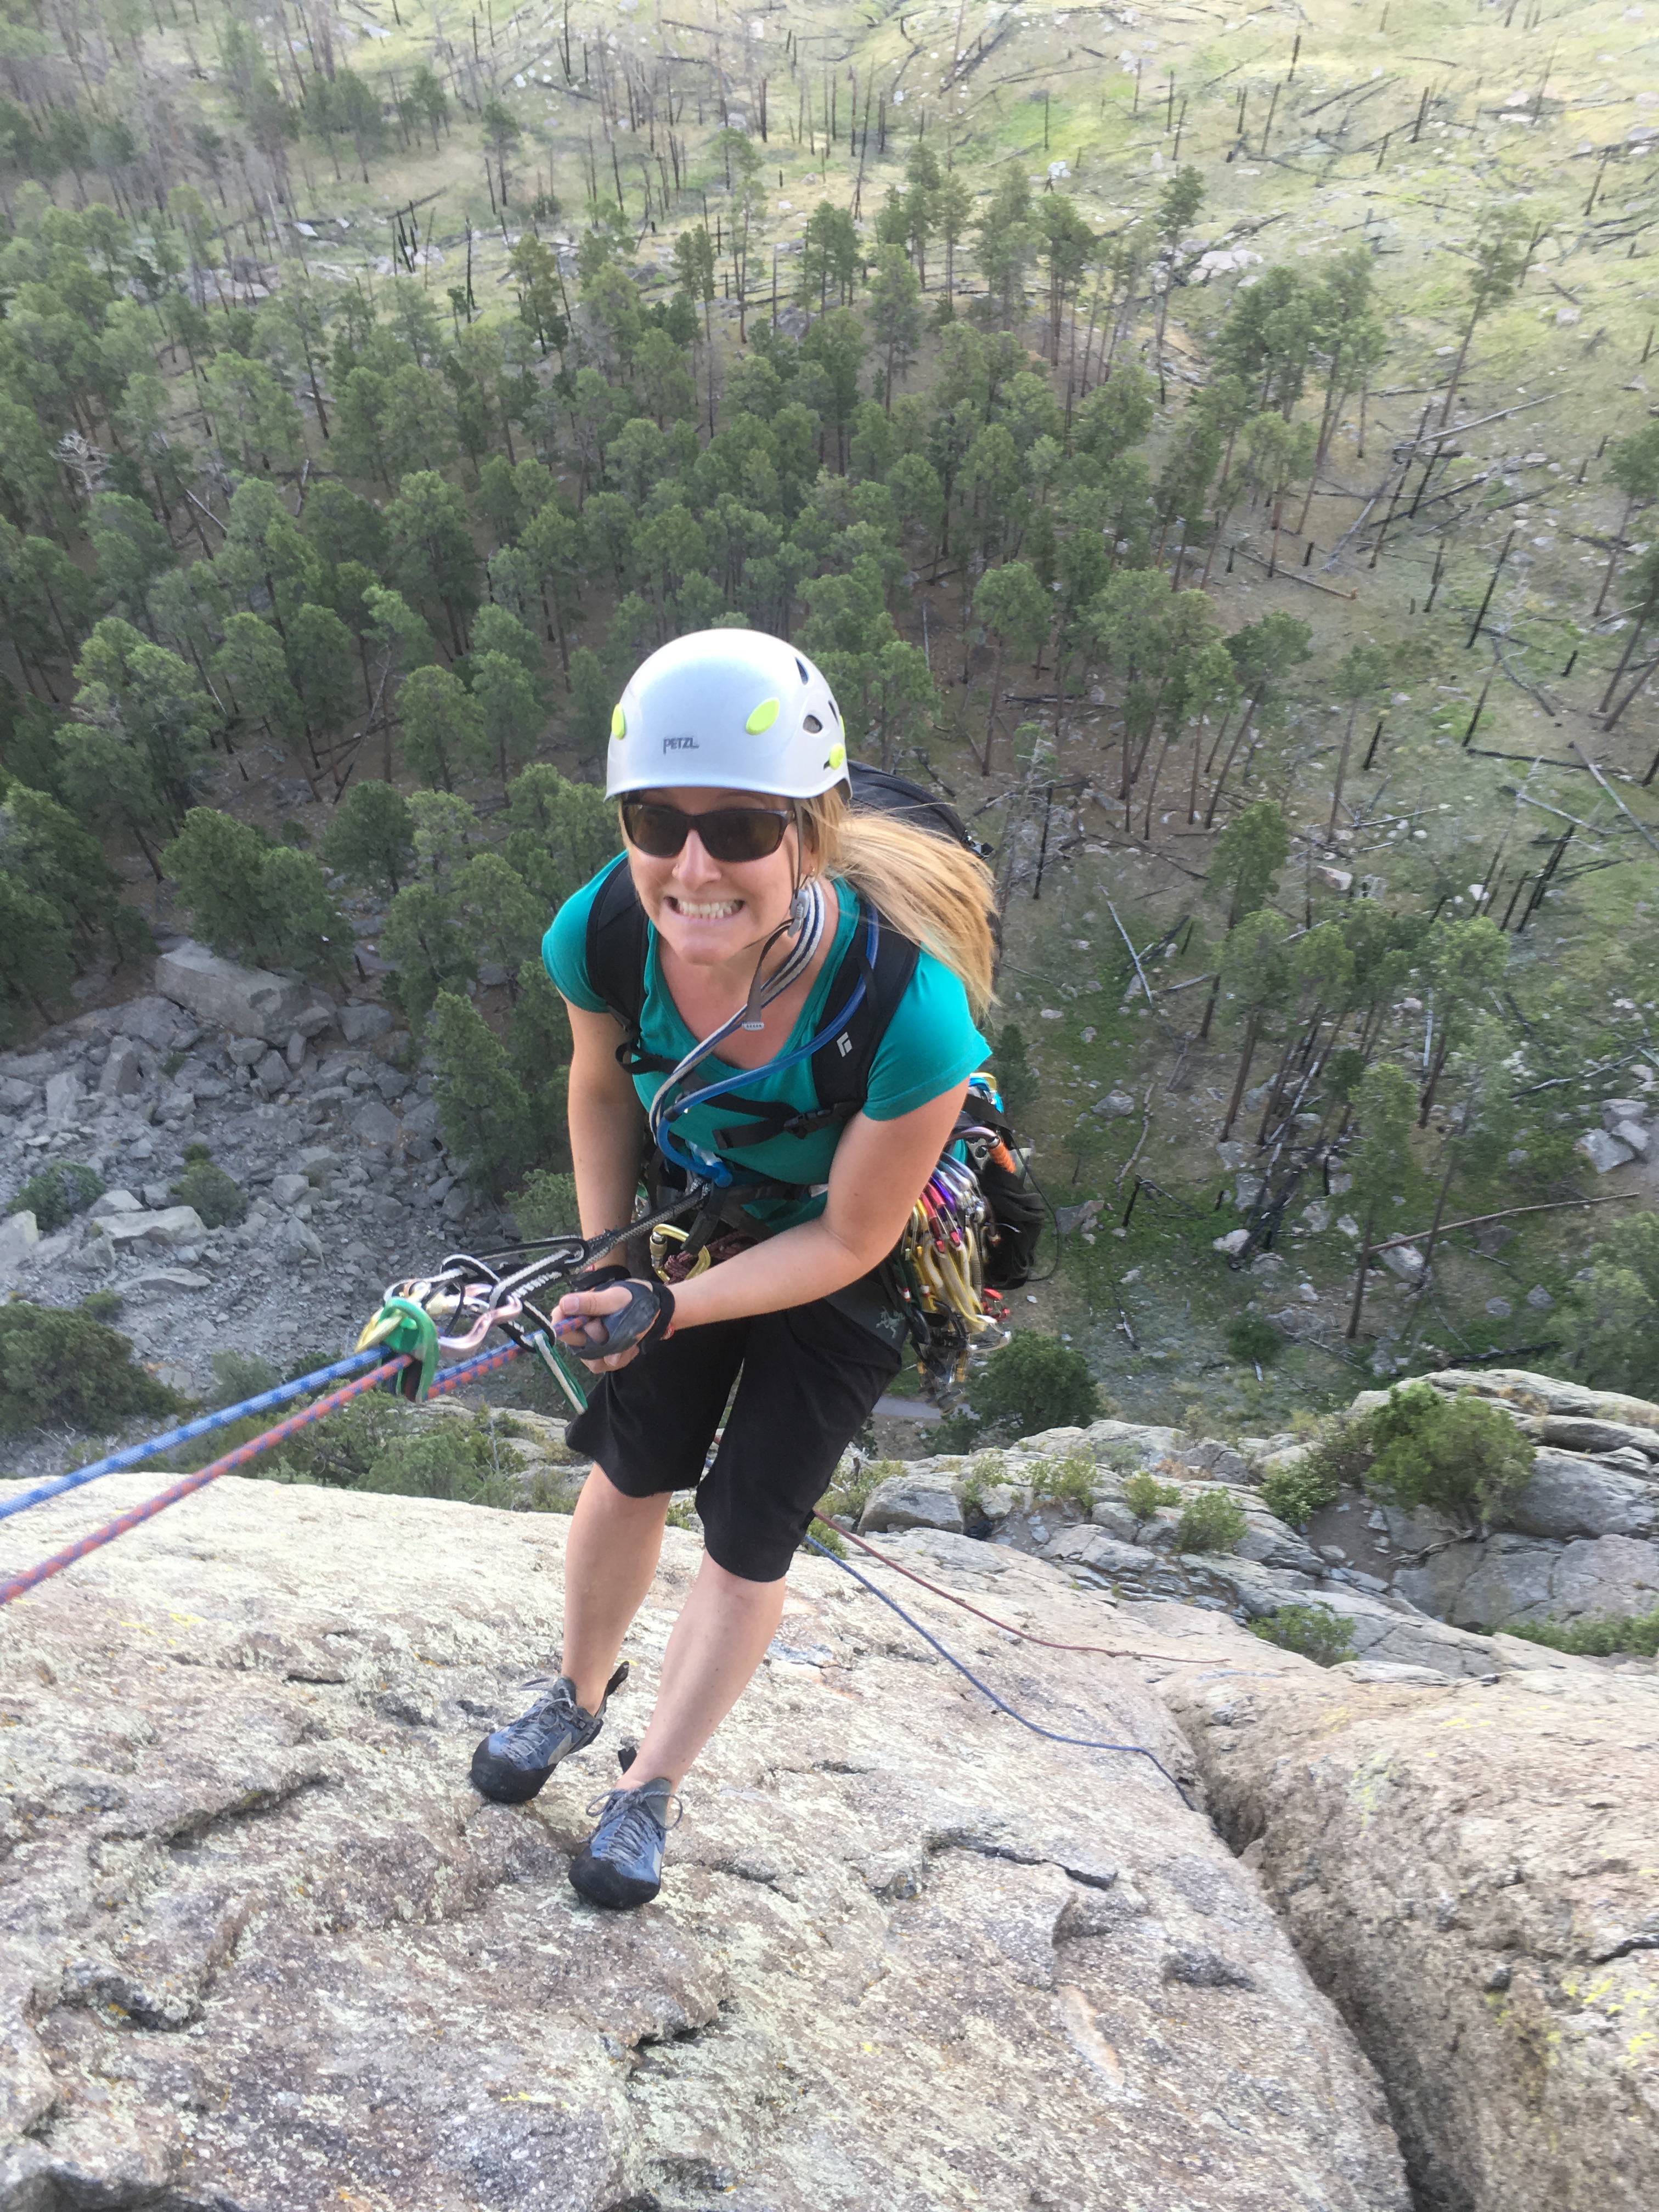
- I was really HOT. We had get alpine starts so we were off the tower by around noon. This also meant we avoided any afternoon thunderstorms, which are common for this area. It’s also helpful to learn at what time of day each of the climbs you want to do is in the sun or shade. Once you’re familiar with the area and the speed with which you’re climbing, there are some climbs you can save for the evening when it’s cooler. Depending on the objective, you may want to consider bringing a lot of water with you in the event that you do get caught climbing in the heat.
- On the topic of heat continued: there is no swimming hole nearby! We’re suckers for jumping in lakes or rivers whenever possible, but there’s no option to do so here. At the park campsite we soaked ourselves at the water pump periodically to cool down.
- Although June would be a great month to climb the tower, there is a voluntary closure during this time. Learn more here.
- There is a prairie dog colony at Devils Tower – they are so CUTE! We recommend stopping by the colony frequently to put a big smile on your face. 😀 You’ll see the colony on your drive in.


Ok, now onto the climbing!
♦ ♦ ♦ ♦
I have rated the climbs we did out of three “stars” relative to each other.
Day 1: Tad (5.7) * → We scoped out the approach the day before, which was useful for efficiency on the day of our climb. While walking right around the tower you’ll come to a pair of telescopes used to view the Rogers and Ripley Stake Ladder – start hiking up from here. You’ll hike up toward the Durrance route (you’ll see the leaning tower above you) then continue up and right via a ramp to a corner – the climb is on the other side of the corner. It’s a bit of a scramble to reach the base of this climb (which is also the base of El Cracko Diablo and Soler), but I’d say it’s mostly class 3 with some class 4 sections. The climb itself is 2 long pitches and then a short, easy scramble to the top. This is in theory dubbed as one of the easiest ways to reach the top of the tower. Rob and I beg to differ! 🙂 It may “only” be 5.7 but it’s stiff for the grade and off-width so if you’re not used to climbing off-widths (like us) then it’s probably going to feel harder than you expect! We thought it would be a good warm-up for the area, but we found it to be rather unpleasant so we wouldn’t recommend it. I just remember pitch 1 being quite wide and exhausting – I had a hard time getting any of my jams to feel secure. I cursed my way up this pitch! 😬 You’ll arrive at a chockstone for the belay and Rob built a gear anchor, so be prepared to do so. I remember pitch 2 being not quite as wide, but still an off-width and I experienced all the same problems as pitch 1, so I continued to curse my way up! At the top of pitch 2 you’ll need to build an anchor again and then it’s just an easy scramble to the top of the tower. Woot woot! For the descent scramble back down the way you came but trend left going past the top of Tad and El Cracko Diablo – you’ll see a set of rappel bolts and thus the start of the “Exit Us” rappels as they’re referred to in the guidebook. Two 70m rappels would have dropped us off at the start of the climb to then reverse the scramble we did on the way up. However, as I mentioned earlier, we tried to rappel further instead of scrambling by taking the “Rainy Day” rappels indicated in the book – DO NOT DO THIS. We ended up basically doing some bushwhacking (!!!) and searching forever for the final set of bolts, which we never found and actually no longer exist! We managed to find a tree to sling, but pulling the rope through these cracks, trees, and bushes was sketchy because it could have easily gotten stuck. This ordeal added at least a couple of hours to our descent, which meant we were still coming down in the heat of the afternoon and we ran out of water. Not fun! Here’s the Mountain Project link about Tad for your reference.
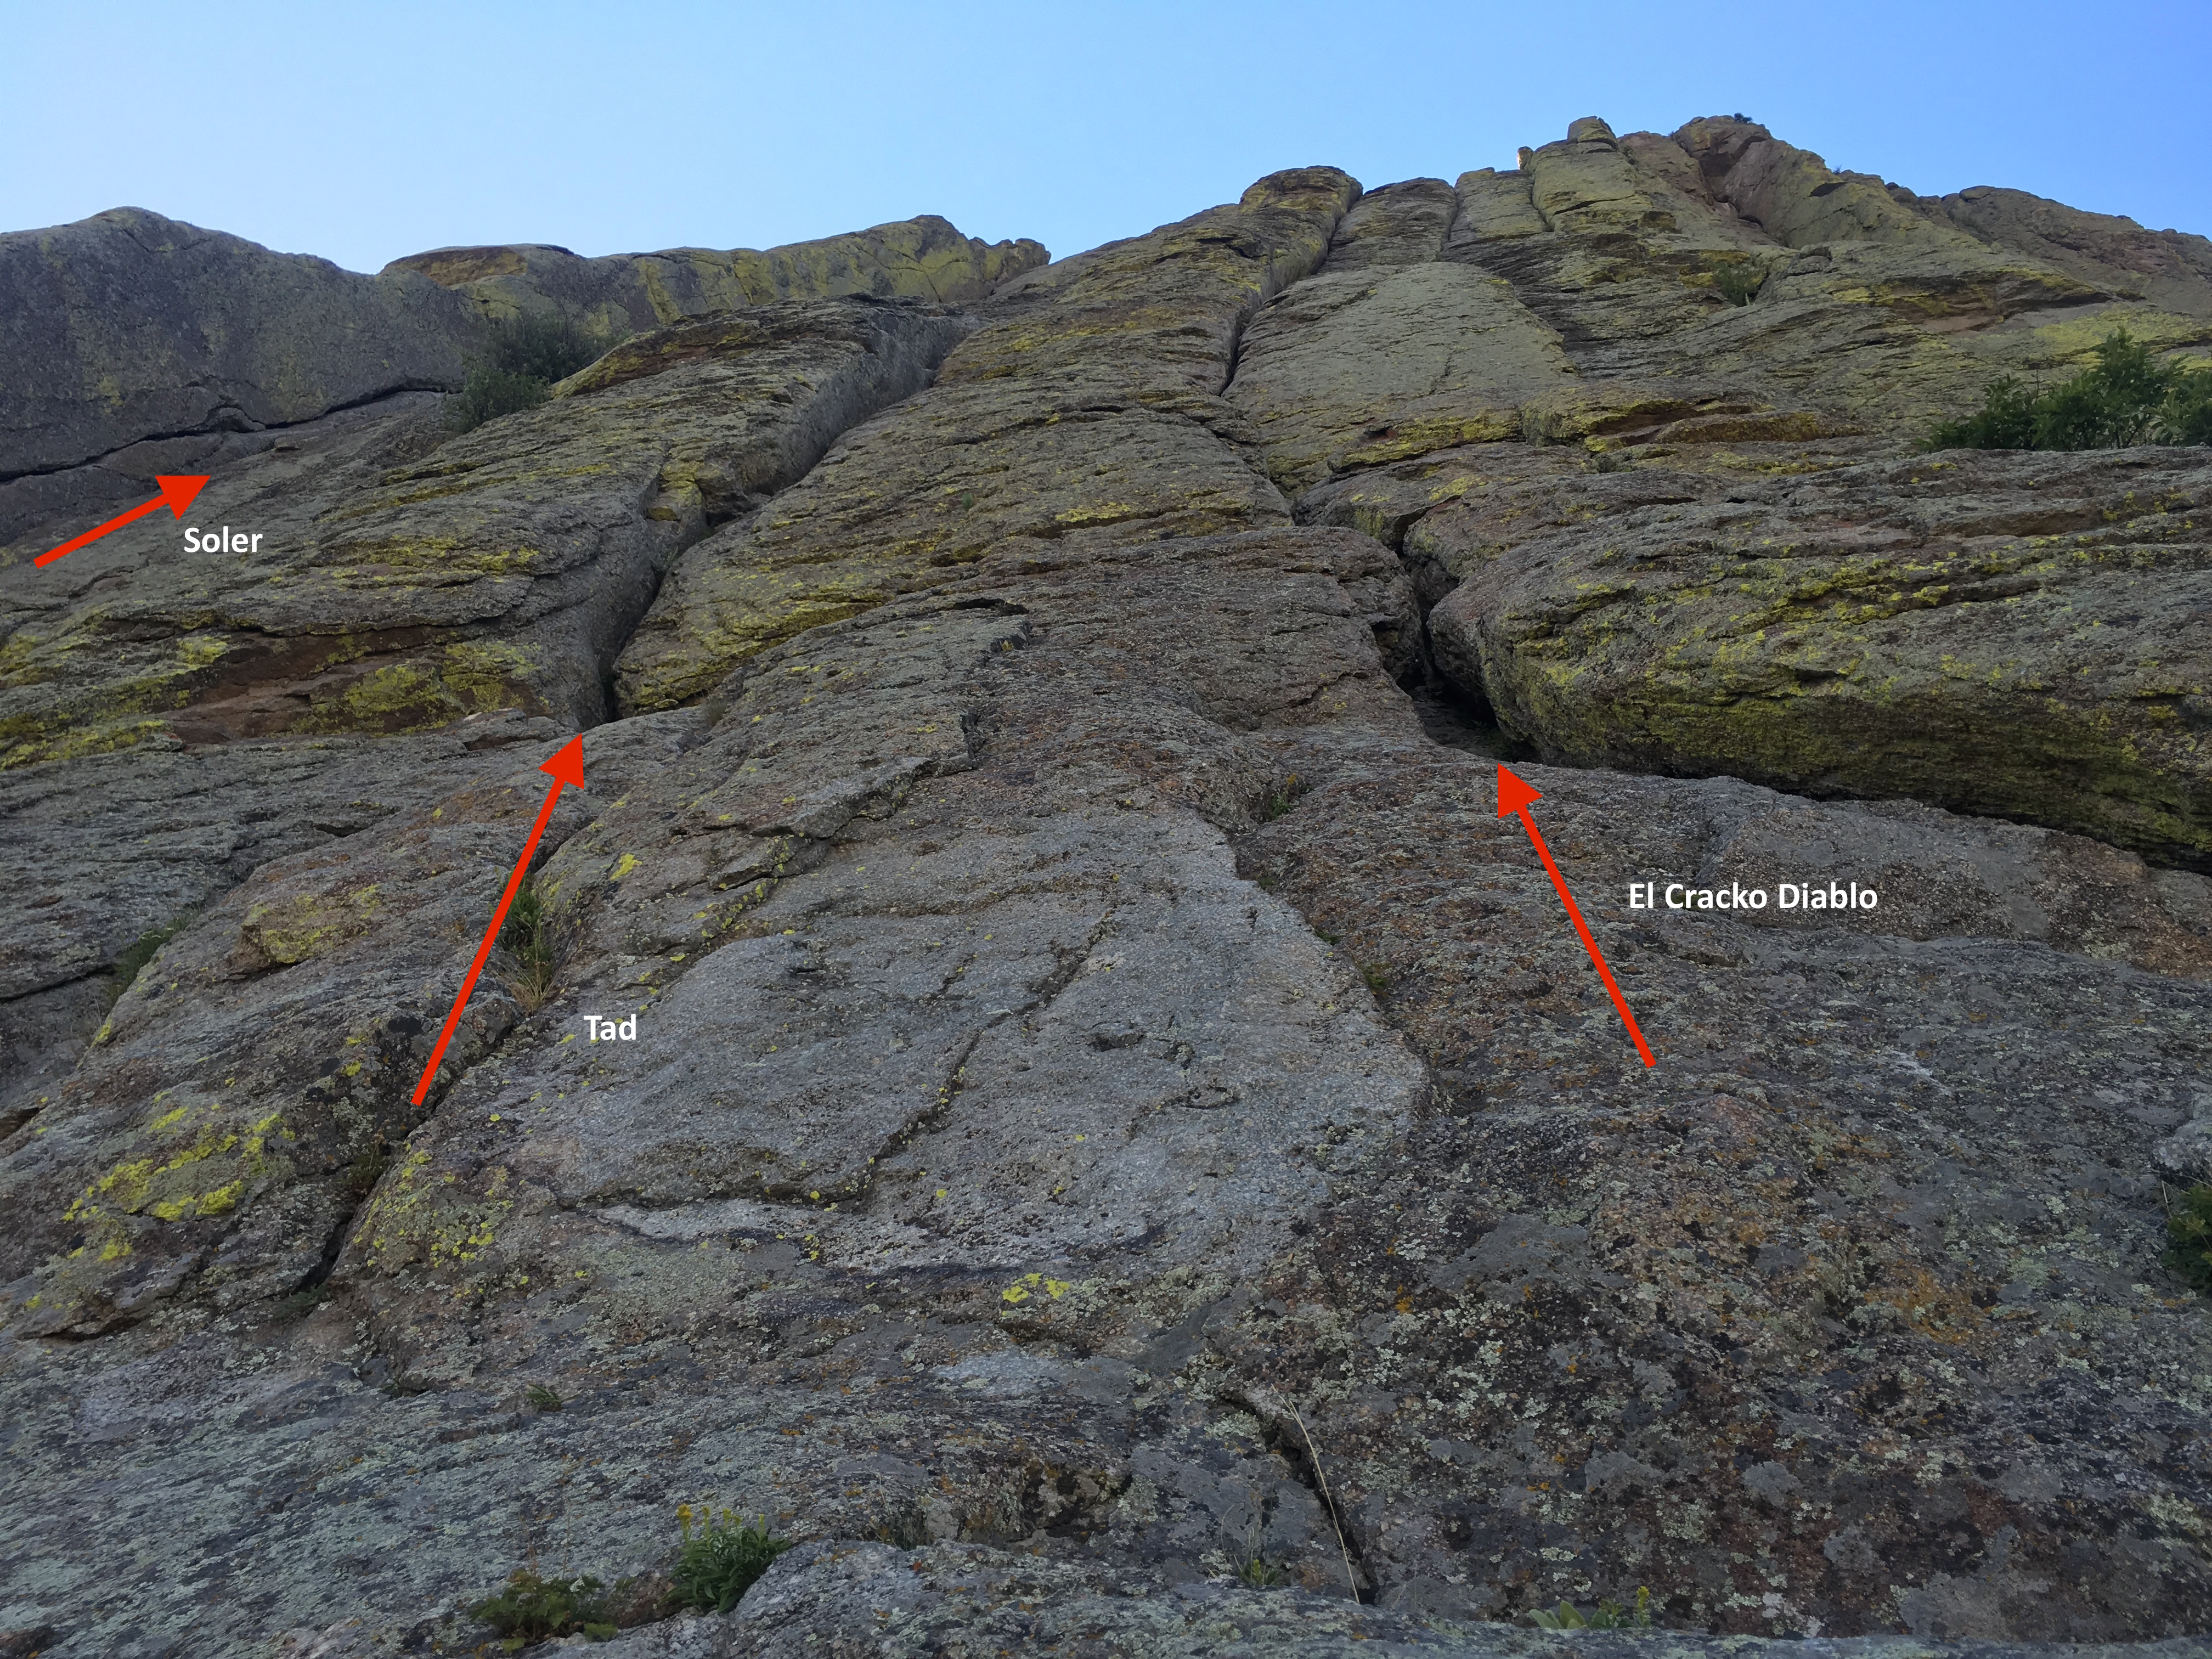
Day 2: El Cracko Diablo (5.8) ** → This climb is also 2 pitches and on the same wall as Tad, thus has the same approach mentioned above. I recall this climb still containing some off-width and flaring crack, but I remember it being a bit easier to find more solid jams compared to Tad. The pitches are still long and the climbing sustained though. We didn’t have to build gear anchors on this route. We did this climb in the evening (this wall was reaching the shade at around 3pm) and didn’t bother going to the top. We took the “Exit Us” rappels and reversed the scramble (Much better than the ordeal we had the day before!). Here’s the Mountain Project link for your reference.
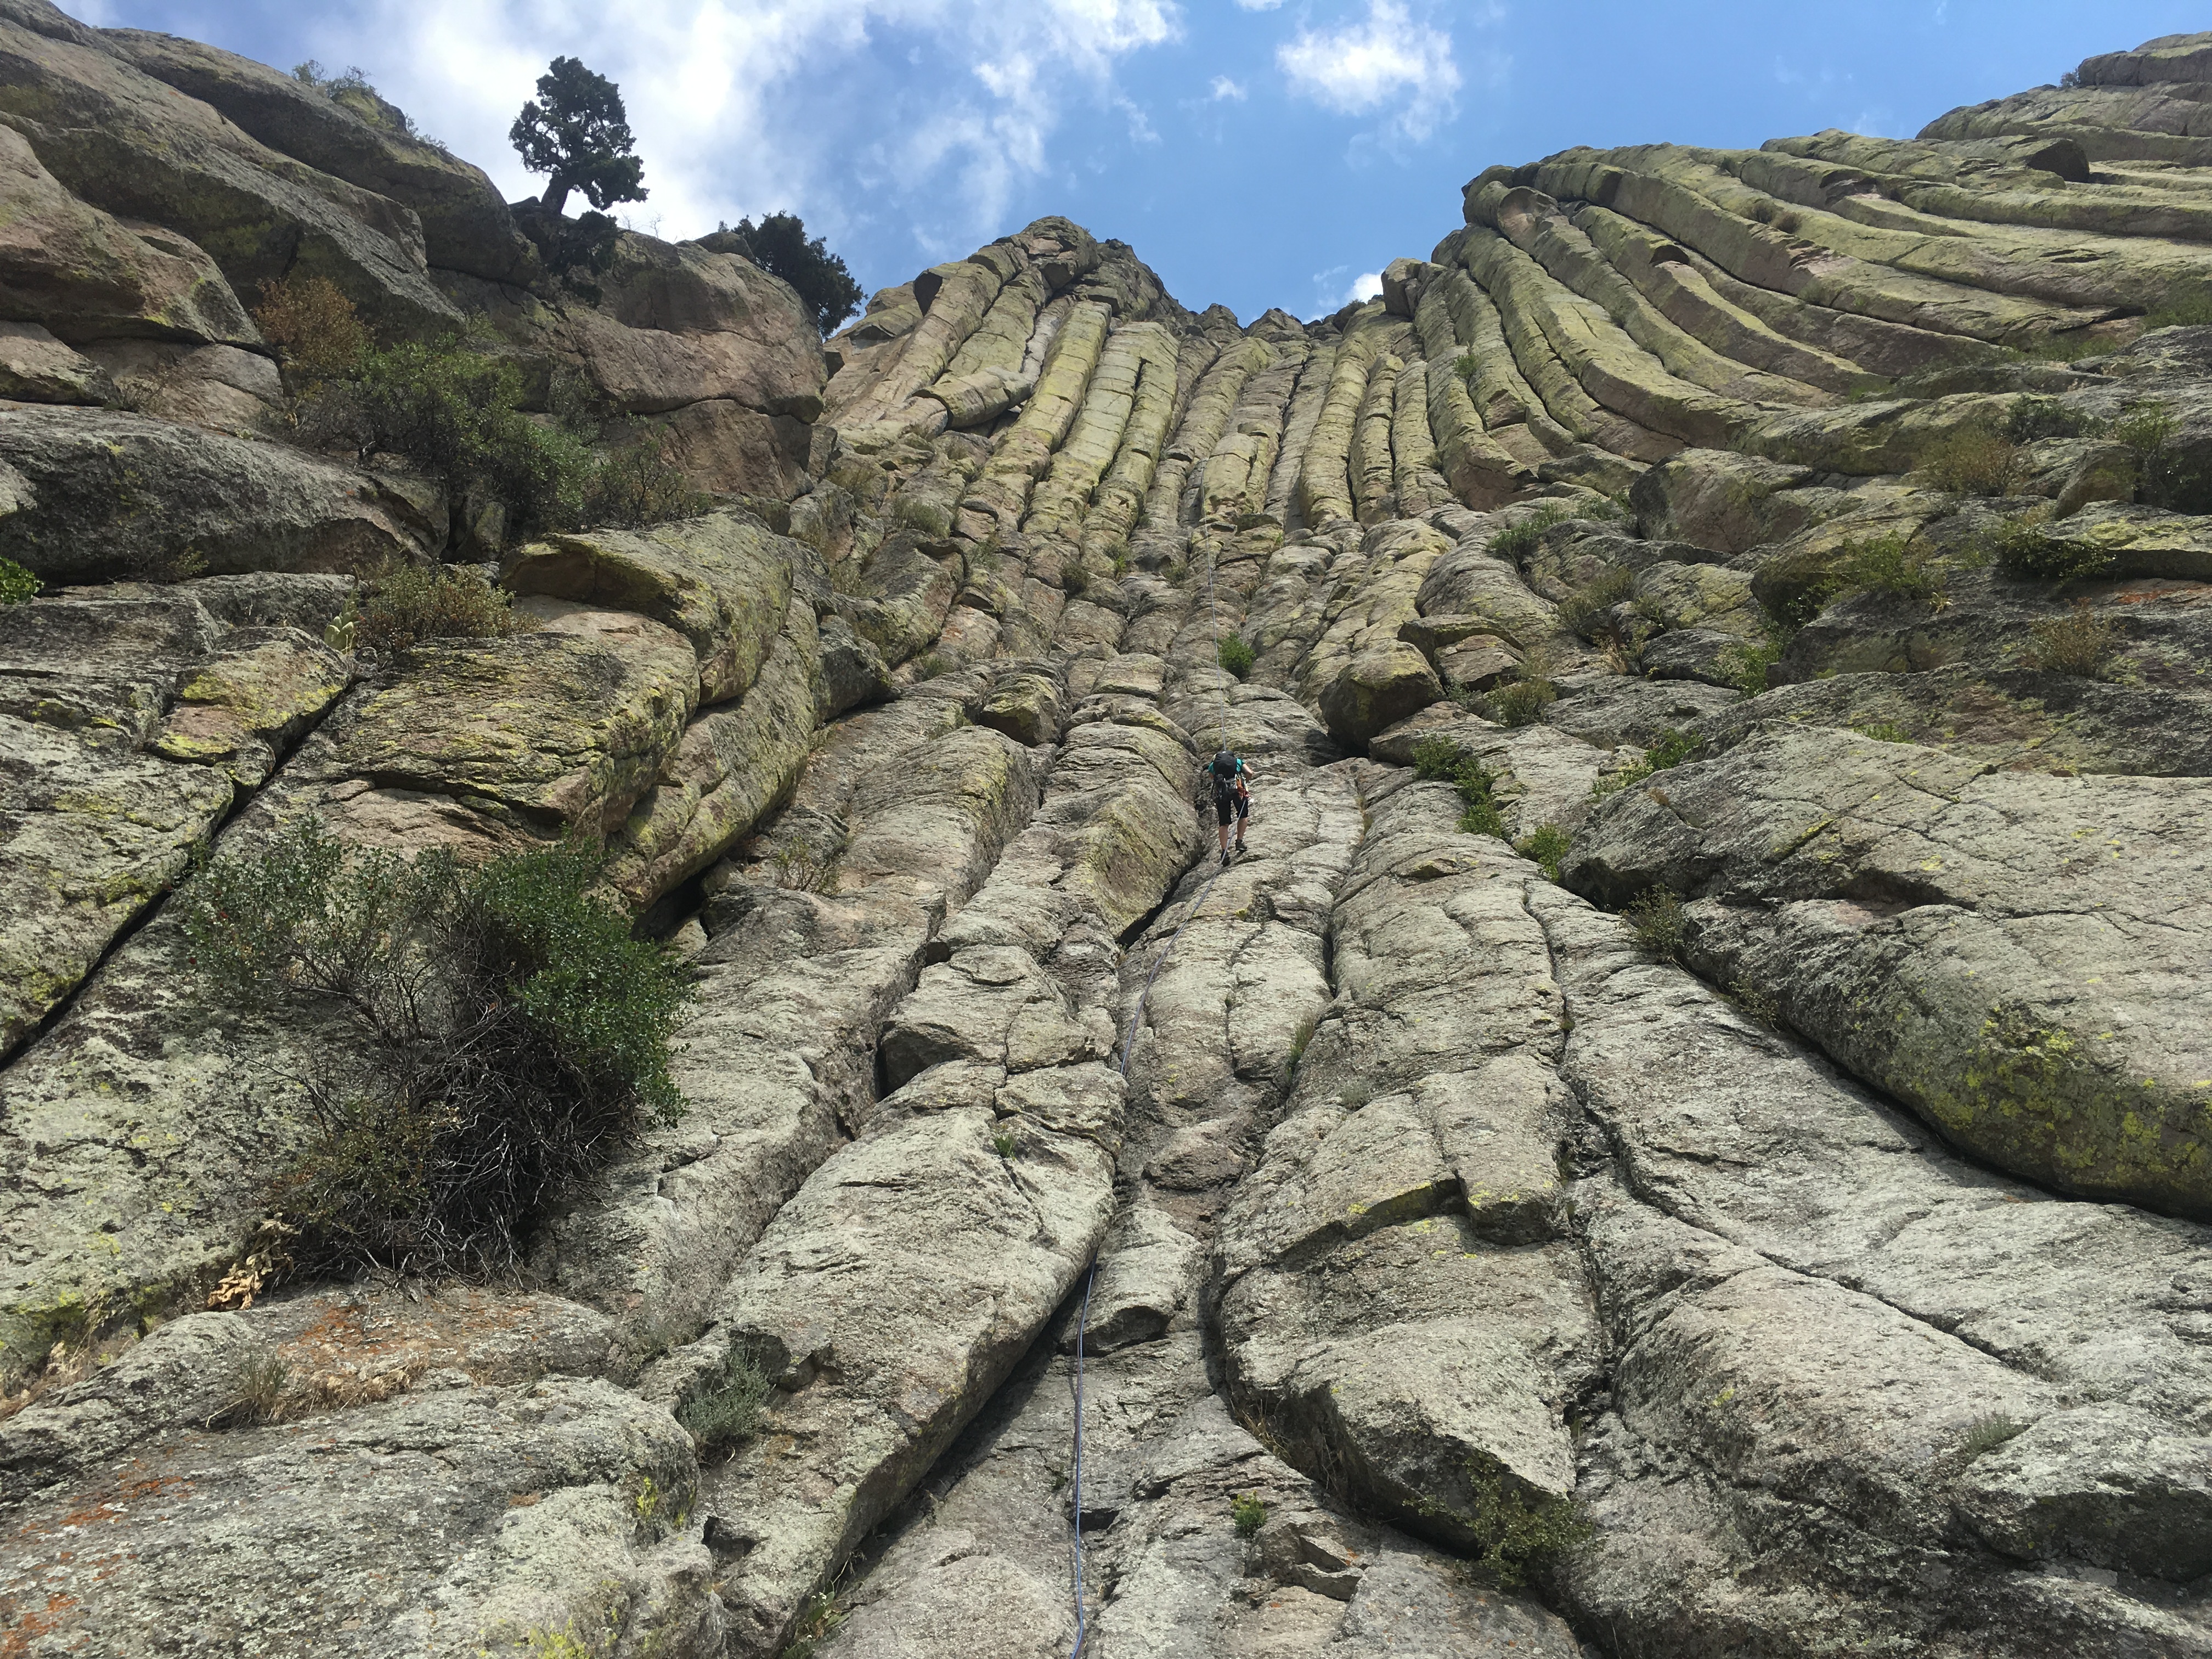
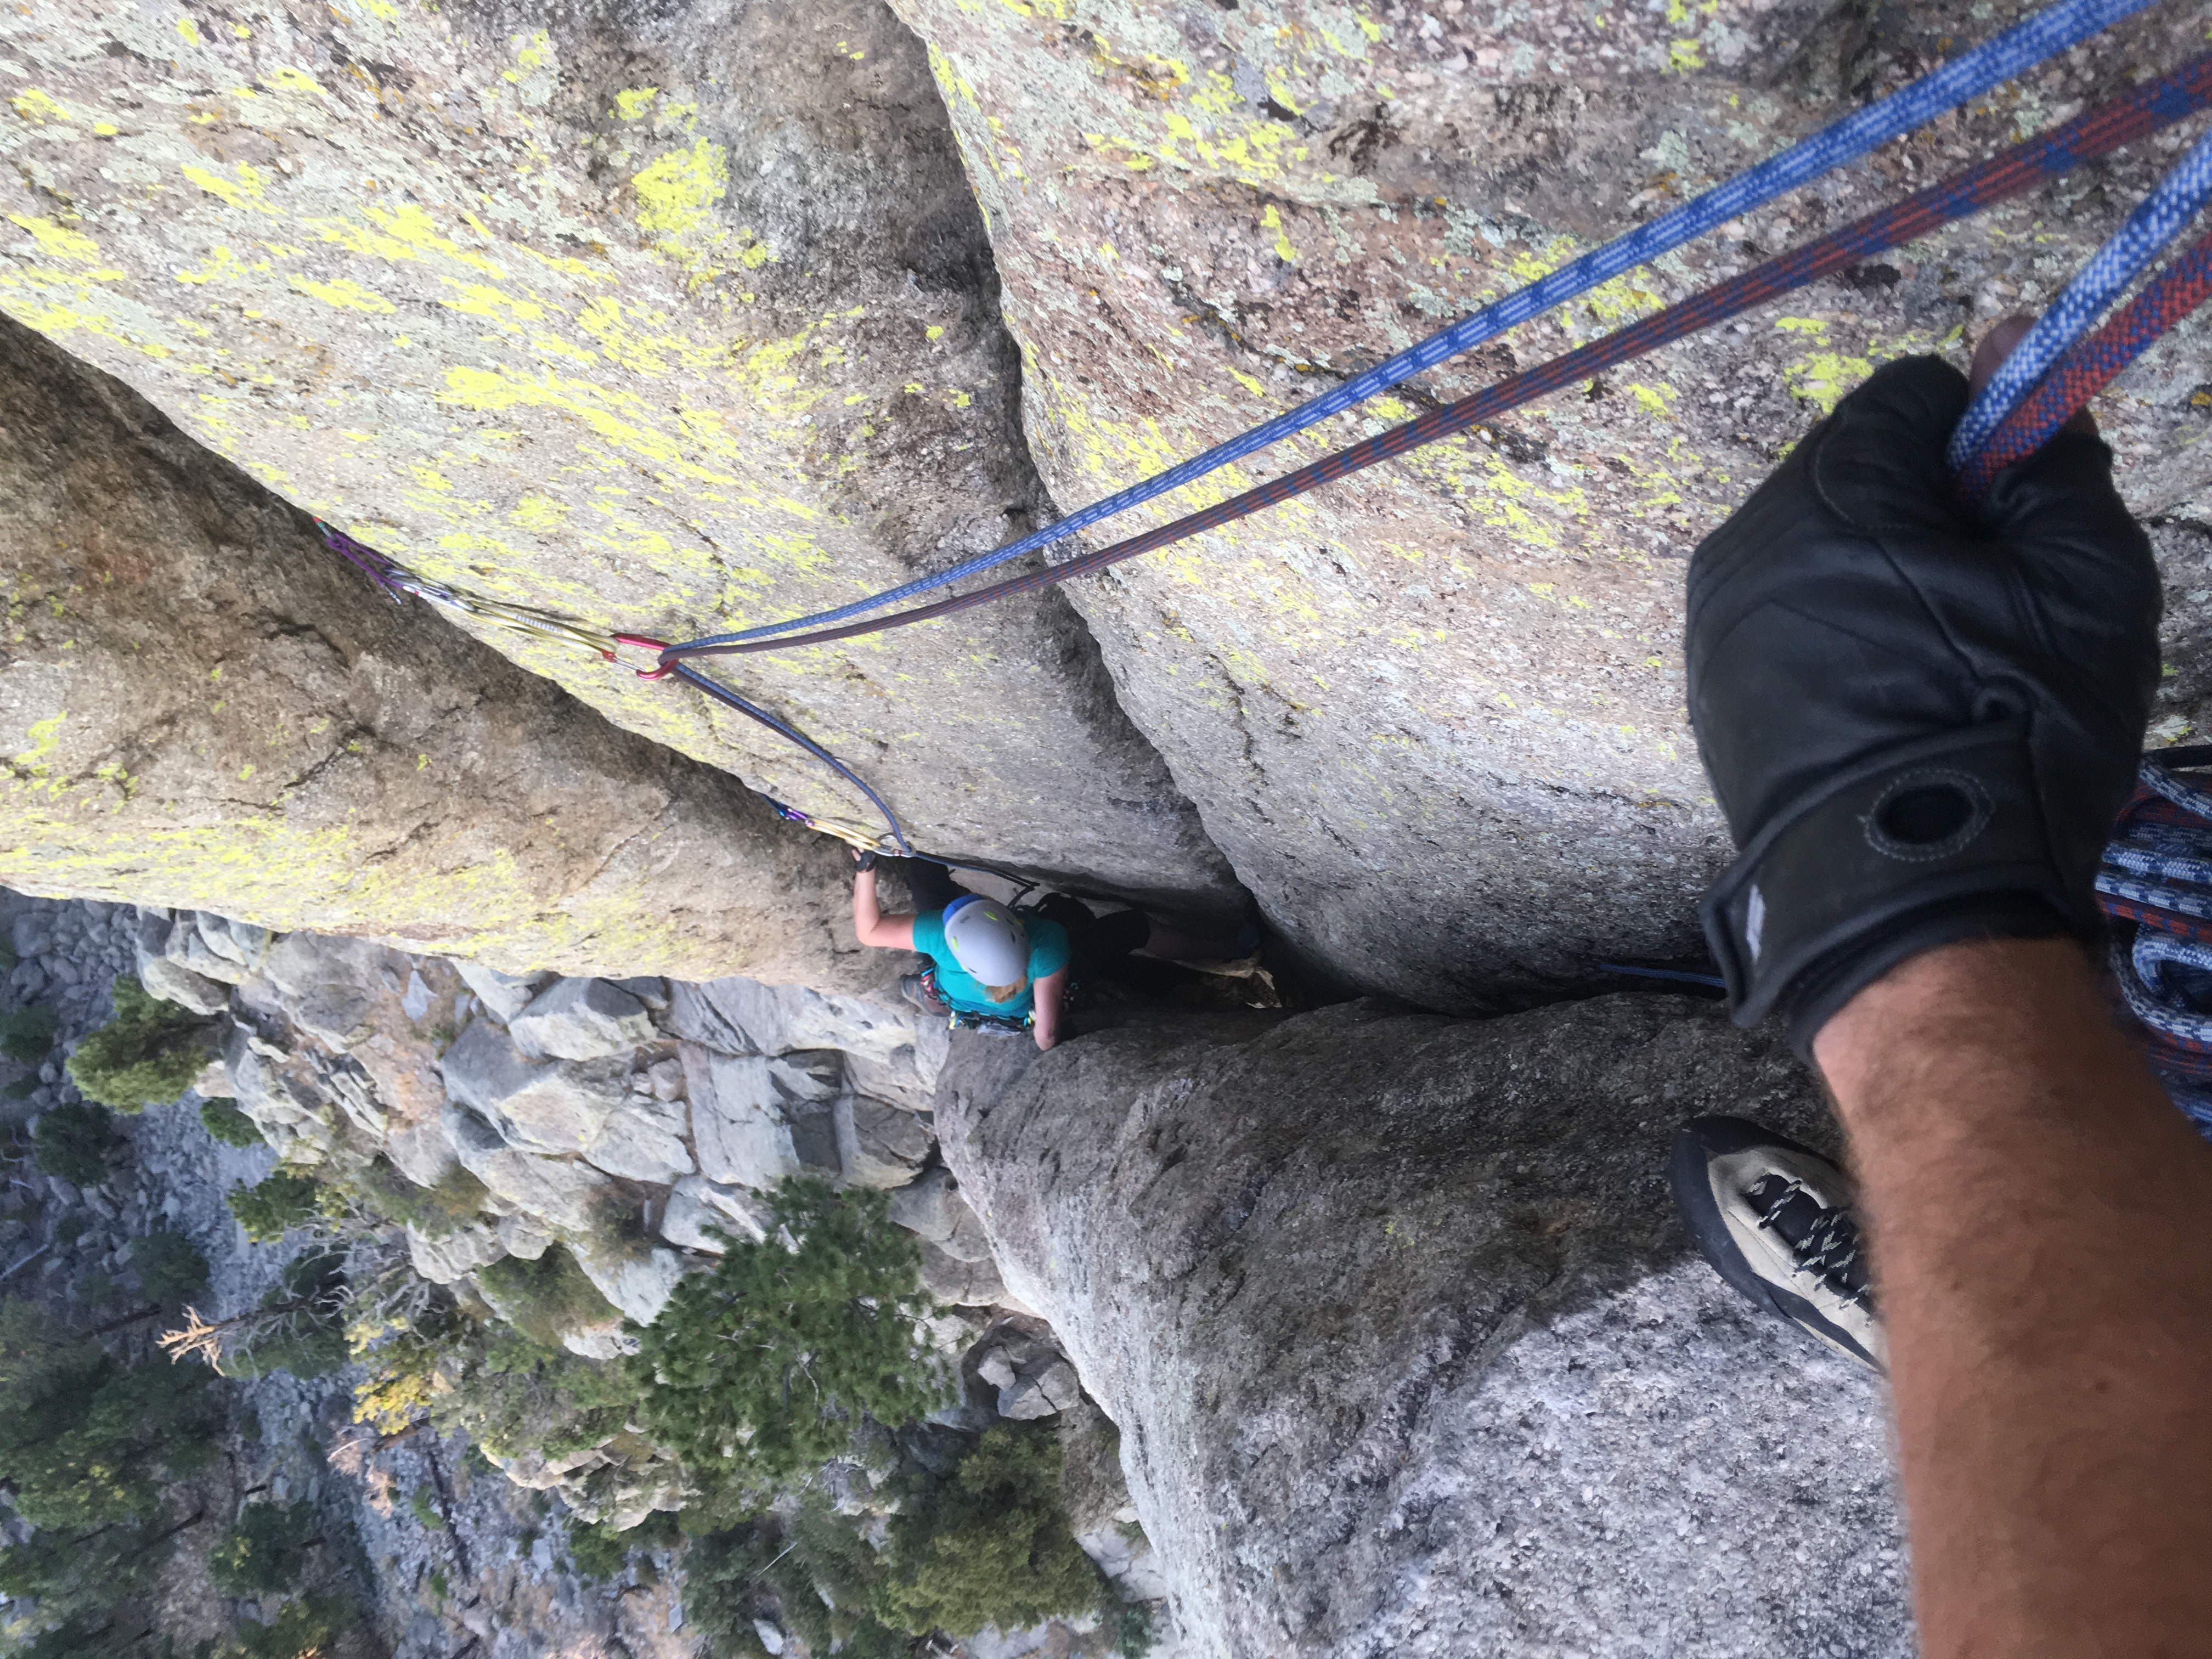
Day 3: Durrance (5.7) with the Bailey Direct finish *** → This was my favourite climb of the trip. There was much less off-width, some fun chimneys, beautiful cracks, and cool features, but still pretty sustained for the grade. There are more pitches (6 pitches give or take, depending on how you climb it) because the route starts right off the trail rather than starting with a scramble and the pitches are shorter. Take the trail up from the telescopes and it will take you to the base of the route as indicated in the picture below. The standard seems to be to get an alpine start for this climb, which is what we did. The original last pitch of this climb is the jump traverse to the meadows and then a scramble finish. We didn’t like the look of this jump traverse, so instead we continued straight up climbing to the Bailey Direct finish to the summit (it’s runs at 5.8). I recommend this because it’s fun and you get to climb more as opposed to scrambling. Doing this finish also sets you up nicely for the “Bowling Ally” rappels, as it ends at the start of the rappels – this is the standard descent. I won’t go into detail describing each of the pitches because they are sufficiently described elsewhere and we didn’t come across any surprises. Some sources say the leaning column is the first pitch, but we pitched it out to reach the base of the leaning column, which I would recommend as we ended up pulling some harder moves. Then pitch 2 was to the top of the leaning column. After that, we linked two pitches together, though I don’t remember which two. Here is a link to a good picture outlining each of the pitches on the route. At the end of every pitch there is a solid belay station so no need to build gear anchors. Here is the Mountain Project link for the climb.


Day 4: Soler (5.9) *** → This climb is on the same wall as Tad and El Cracko Diablo, thus 2 long pitches, has the same approach, and can be done in the evening as well. The first pitch is a BEAUTIFUL, albeit sustained, crack climb with no off-widths! It ends at a bolted belay station which is nice. Unfortunately, I had received some bad news about a friend the day before and was just not feeling great, so we actually turned around after pitch 1. It would have been really nice to continue onto pitch 2 if I was feeling better – pitch 2 looked just as beautiful as pitch 1 and ends at a bolted belay. Highly recommend this climb! Here the Mountain Project Link.
Climbing.com also published this fantastic article on climbing at Devils Tower. It mentions a lot of the other routes that were recommended to us as well, especially Walt Bailey (5.9) and Assembly Line (5.9).
Here’s the Amazon link to the guidebook if you did want to purchase it ahead of time.
Key takeaways: No other revelations or things worth noting – everything I want to say is mentioned above!
Have any questions about this trip or updates to add? Leave a comment below or email me!
Until next time…
Keep on rockin’ 🗻
J.
